
Why do car doors lock when the car is on fire? The answer to this question can save many lives who fail to exit their vehicles in a life-threatening situation. Car owners often felt helpless when trying to escape a car emergency through the doors. While the doors do not automatically lock when the car is on fire, some causes can lock/jam the door, putting the car owner in a vulnerable position. In this post, you will learn about the causes of car doors getting locked and the steps to get out of it successfully. In some cases, car doors lock or malfunction due to extreme heat and damage caused by fire. One of the worst victims of a car fire is a power failure. A door’s locking mechanism is internally linked to a car’s electrical system. When the power fails, it impacts the electrical system of a car resulting in the malfunctioning of all the electrical components including the door’s locking mechanism. Secondly, if the car fire is caused by a major crash/accident the eventful impact could lead to a defect/malfunctioning in the door latch which may fail to open. Additionally, some car models are featured with automatic locking systems when the car is in motion. This could become a potential hindrance to escaping the car immediately if the locking system is affected by the impact of fire/accidental damage. In any case, it is important for car occupants to be aware of their vehicle’s safety features and the causes that lead to car doors getting locked. A car fire can cause a power failure if it damages the electrical system/components of the vehicle. The electrical system of a car is responsible to transmit power for the functioning of various components including the engine, lights, and other electronic devices. In most modern cars, the door locking mechanism is part of the electrical system which is operated through the car’s central locking system. If a car fire harms any of these components it can cause power failure which can make it difficult to unlock the door from inside. Even the remote and keyless entry may not work in such conditions. However, it’s worth noting that not all cars are equipped with the same locking mechanism and the specific cause of door locking due to power failure can vary depending on the car make and model. There is no denying the fact that a car can catch fire as a result of an accident. The impact pressure meaning the force of a crash or collision can play a major part in a car’s door-locking mechanism. The forceful impact often damages the door handles and overall door structure which can eventually lead to damage of a car’s locking mechanism. The damage can prevent the doors from unlocking leaving the occupants stuck inside the car for a long time. A defective or malfunctioning latch can cause a car door to lock/jam in an emergency situation. This is because a latch is an important part to secure or hold the car door closed. There are several ways that a latch can get defective after a crash or accident. If the latch is broken, misaligned, or become faulty it may not be able to release the door or engage with the striker plate on the door arms which can prevent the door from opening when the handle is pulled. For any of the above reasons, if a door latch is not working properly it creates a potentially dangerous situation of trapping the occupants of a car inside. When you find yourself trapped in a car with doors locked here are some of the steps you can take to get out of the vehicle safely: First of all, stay calm and assess the situation. Check the alternative doors or windows and try to open them to see if you can escape. If none of them works look for the objects or tools to break the windows. Using the objects There are several objects that can be used to escape a car when the doors are locked. The most commonly used is the seat headrest. Dislodge it from the seat and use its metal poles to break the windows. If you are unable to remove the headrest or feel that it is not strong enough look for other heavy and sharp objects made of metal. Some of these include tire iron, screwdriver, knife, scissor, or any type of metal rod. It is important to note that when using any object aim for the corners of the window as they are typically the weakest and can be broken with minimum effort. Physical effort Using the objects and escaping from the car isn’t a cakewalk. In fact, it may require calculated effort and exceptional physical strength in some cases. The amount of effort required will depend on your physical power, as well as the strength and thickness of the glasses and object you are using to break it. If a car door is jammed, it may require significant effort to break the windows using the headrest or any other object. Attempting to forcefully break the window could be difficult especially, if you are in a stressful state of mind. It is therefore necessary to keep calm and conserve your energy as much as possible. While performing the breaking task use your body weight and strength to help you exert more force. Take breaks if necessary and catch your breath if you feel overwhelmed or fatigued. Car escape tools Instead of using miscellaneous objects, there are multiple escape tools designed to help vehicle owners free themselves in an emergency especially when the car doors are locked. These are: Emergency escape tool – Emergency escape tools normally consist of a combination of a hammer and a seat belt cutter. Such instruments can be used to break a window and cut a seat belt without too much effort. Multi-tool – Multi-tool is a versatile tool that includes a variety of instruments such

Can you charge a motorcycle battery through a cigarette lighter?
You can charge a motorcycle battery with a battery charger, and a jump starter cable which is obviously a more conventional and safe way for charging. There is one more option to charge a motorcycle battery which motorcyclists often want to explore – the cigarette lighter! So, can you charge a motorcycle battery through a cigarette lighter? A cigarette lighter is a common source to power small devices such as phone chargers or portable music players but is it capable enough to perform motorcycle battery charging? If yes, are there any risks involved in charging a motorcycle battery through the cigarette lighter? What is the correct way to charge a motorcycle battery using a cigarette lighter? You will find the answers to these questions and many others related to motorcycle battery charging in this post! Yes and no. Generally, motorcycles do not have a cigarette lighter option so you cannot charge the battery directly through the motorcycle. Alternatively, you can find some aftermarket cigarette lighter sockets that can be installed on a motorcycle for charging various devices. But the amp capacities of such sockets do not favor battery charging. On the other hand, you can charge a motorcycle battery through a car’s cigarette lighter socket provided certain requirements and factors are met. First of all, both the batteries (motorcycle and car) should have the same voltage capacity. Secondly, necessary add-ons in the form of an adapter/charger, and a current resistor/limiter will be required for proper connection and to control the current flow. Moreover, a battery should be properly placed, connected, and secured to avoid electrical hazards and explosion risks in a car. Taking the above factors into consideration you can successfully charge a motorcycle battery using a cigarette lighter however the process is still potentially dangerous. Doing this could lead to a battery explosion, acid spillage, damage to the car and its accessories, and physical injuries or accidents. It is therefore not recommended to charge a motorcycle battery through a cigarette lighter as it is not specifically designed to supply power for charging. However, if you have no other option but to use a car’s cigarette lighter for charging then ensure the following requirements are in place… The first criterion to use a cigarette lighter for charging is battery volts. Car batteries are 12 volts and motorcycle battery volts vary according to the size and type of motorcycle. If the motorcycle battery volts are less than 12 volts it could blow the fuse in the cigarette lighter circuit and seriously damage the motorcycle battery. Ensure the battery volts are the same otherwise… Never try to connect a motorcycle battery directly through the cigarette lighter, especially the one that is significantly discharged. Such conditioned batteries pull power heavily which could be too much for a cigarette lighter. Connect the battery through an adapter or specialized chargers for proper connection with the cigarette lighter. There are extended adapters/chargers that you can find here to help you connect and charge the battery in the correct way. To balance the voltage and amperage add a diode or a small bulb series to your connection. This will ensure to keep the current flow in check while charging the battery and prevent the vehicle parts from getting damaged. Related Read: Jumpstart a car with household items You won’t be able to charge a motorcycle battery without disconnecting it and taking it into your car. As a matter of fact, this is one of the biggest drawbacks of using a cigarette lighter for charging. You will have to find a place suitable for charging and it should be close to a cigarette lighter for a hassle-free connection. Taking the car seat into consideration, you can secure the battery in the foot well which will also offer convenience and flexibility while charging. Moreover, keep the windows open while charging to let the gases evaporate sufficiently which will keep the risk of sparks and fire away. It is very important to connect the charger clips to the right terminals of a motorcycle battery. Wrong connection is a common mistake many motorists perform so ensure both cables are connected in proper order (with one being grounded). From a grounding perspective, you may have to choose a metal that is safe and effective. In this case, you may have to look below the car seats to find suitable bare metal for grounding of cable. There are certain risks and dangers you must take into account while using a cigarette lighter as a source for motorcycle battery charging. Battery explosion and spillage due to overcharging Since the cigarette lighter is not designed to handle the charging current required for automotive batteries there is a potential risk of electrical hazards due to overcharging. The fuse circuit may blow out owing to the difference in battery power and voltage. The low amp resistance of cigarette lighter could damage the motorcycle battery causing it to explode and spill acid. Off-gassing Automotive batteries consist of sulfuric acid and water that evaporates in the form of hydrogen gases. The process continues irrespective of the battery position which always poses the risk of sparks and fire. It is extremely dangerous to charge a motorcycle battery inside the car with doors and windows closed. When the hydrogen gases come in contact with other flammable substances it can generate sparks which could turn into disastrous fire. Injury, eye, and skin irritation Flammable gases circulating in the air are not good for human health. With the cabin closed, the combination of these battery gases released during charging may cause skin and eye irritation when you remain in the car. In a worst-case scenario, if the gases explode it could cause physical injuries to the person performing the charging. Damage to the car Expect serious damage to the car’s electrical system, battery, and overall structure with the explosion of battery (s). With the spillage all around you are bound to witness burns, holes, and crack to the car’s flooring, upholstery, and
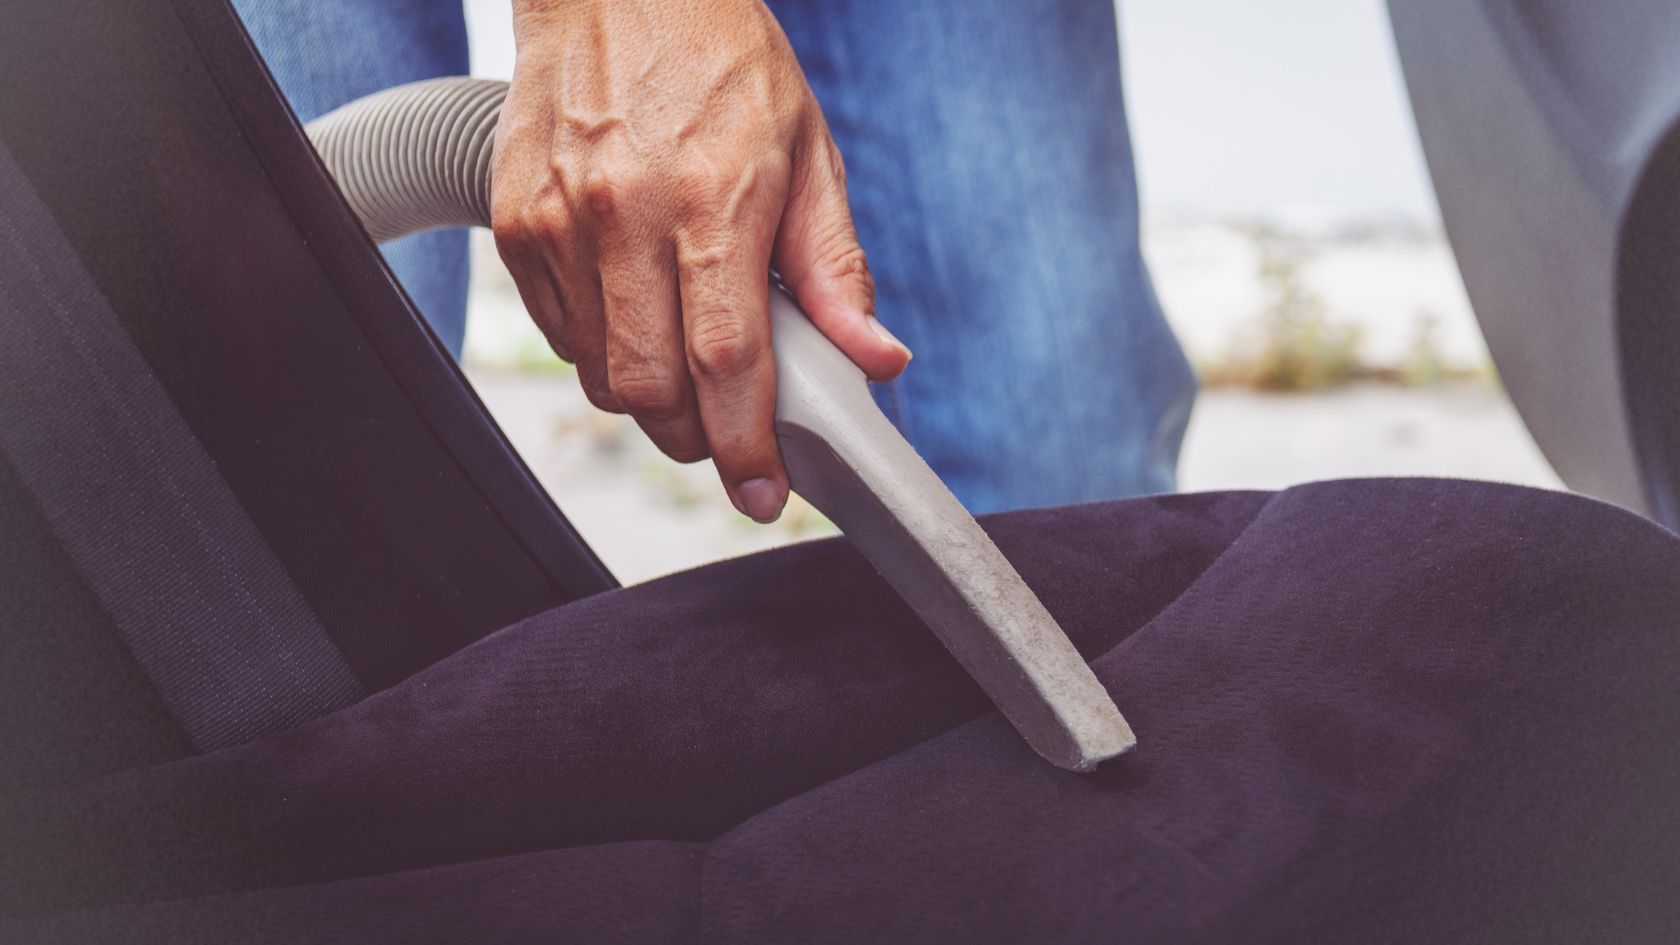
How to Properly Maintain and Extend the Lifespan of Your Car Vacuum Cleaner
If your car is in need of a thorough cleaning the first thing that comes to mind is a car vacuum cleaner. This handy device is essential for keeping your vehicle’s interior pristine and free from dirt, dust, and debris. At the same time, it is important to keep a car vacuum cleaner in top condition for long-lasting usage. Like any other tool, a vacuum cleaner also requires proper maintenance which many motorists ignore. In this article, we’ll guide you through effective maintenance tips to maximize the longevity of your car vacuum cleaner. From regular cleaning routines to storage practices and troubleshooting, you’ll discover everything you need to know to keep your car vacuum cleaner performing at its best. So, keep reading till the end! A car vacuum cleaner normally consists of several key parts that work together to ensure efficient cleaning. The main components include the motor, dust canister or bag, filters, brush or nozzle, and attachments. The motor provides the necessary suction power, while the dust canister or bag collects the debris. Filters prevent dust and dirt from escaping back into the air. The brush or nozzle helps to agitate and remove dirt from various surfaces. All these parts are interconnected and any negligence in maintenance could result in malfunctioning or damage. To use their services uninterruptedly for a long time it is vital to perform timely maintenance. Just normal cleaning may not provide desired results so ensure to follow the step-by-step maintenance process mentioned below for optimal performance of a vacuum cleaner. Empty the dust canister or bag Regularly empty the dust canister or replace the bag to prevent the build-up of dirt and debris. This will help maintain the strong suction power of the vacuum. Many motorists ignore the cleaning aspect of dust canisters or the replacement of bags for a long time. Avoid doing this as it can seriously hamper efficient cleaning and may even cause early wear and tear to the internal parts. Do not wait until the canister or bag is completely full; instead, empty it when it’s around two-thirds full. This will ensure enough space is available whenever you want to use the vacuum to collect the waste. Clean the filters Keep the filters clear for efficient filtration. This is one of the important factors to keep the vacuum running for a long time. Check the manufacturer’s instructions to identify the type of filters your vacuum cleaner has. Primarily, bagless vacuums are equipped with filters that need regular monitoring. Clean or replace them accordingly to ensure optimal performance and prevent clogging. Remove tangled debris The brush and nozzle are often blocked or clogged with consistent usage of a vacuum cleaner. To avoid these obstructions, remove tangled debris from the brush or nozzle regularly. Check for hair, string, or other objects after every use. These may hinder the vacuum’s effectiveness. Clearing these blockages in a timely manner ensures uninterrupted cleaning and best results. Choose the right storage location The storage of vacuum cleaners is something you must give serious attention to. Vacuums are vulnerable to damage due to exposure to moisture and extreme temperatures. Avoid storing it in areas prone to humidity or direct sunlight, as these can damage the components over time. Consider using a dust cover or storing it in a protective case to safeguard it from environmental elements. More importantly, if it is a portable vacuum cleaner a car’s trunk would be an ideal place for storage. If you cannot carry it along choose a dry and well-ventilated area in your home or office. This will ensure your vacuum cleaner is preserved from damaging external sources and environmental factors. Secondly, keep everything organized and accessible by storing attachments and accessories properly. Related Read: 9 must-have accessories for your car vacuum cleaner Utilize designated compartments or storage containers to prevent them from getting lost or damaged. This ensures easy accessibility when you need them for specific cleaning tasks. Repairing or replacing damaged parts With consistent usage and aging, vacuum cleaner parts are prone to damage or wear and tear. Should you come across damaged parts, such as a broken hose or brush, it’s important to address them promptly. Technically, it won’t be possible to repair the faults of some parts on your own. Consider contacting the manufacturer or a professional to obtain the necessary replacements or repairs to restore functionality and performance. Many users take a casual approach while cleaning their cars. Rough usage and improper techniques are responsible factors in shortening the lifespan of a vacuum cleaner. It’s important to follow some optimal usage techniques and avoid excessive strain to get the most out of your car vacuum cleaner and prolong its lifespan. Here are some recommendations to consider: I am sure by implementing these techniques you can optimize the performance of your car vacuum cleaner and enjoy its benefits for years to come. You must also implement some preventive care practices to ensure your car vacuum cleaner stands the test of time. Considering the following key strategies will help you extend the lifespan of your cleaning companion: The run time may depend on the type of vacuum cleaner you have. Most household vacuum cleaners, particularly corded models, are designed to run continuously for up to 30 minutes. Some models can run up to 60 minutes as well. Similarly, commercial units may have longer running times and are built to handle more extended periods of continuous use. The cleaning factor of a vacuum cleaner includes several factors. While the whole unit should be cleaned and washed every six months or a year, the cleaning of vacuum cleaners accessories, and parts should be performed based on their usage. For example, filters should be cleaned or replaced every 3 months or as recommended by the manufacturer. Similarly, other parts should be regularly inspected, cleaned, and maintained in a timely manner for maximum performance. Vacuum cleaners are often mistreated while cleaning a car, especially by novice users. The cleaning aspect is prioritized
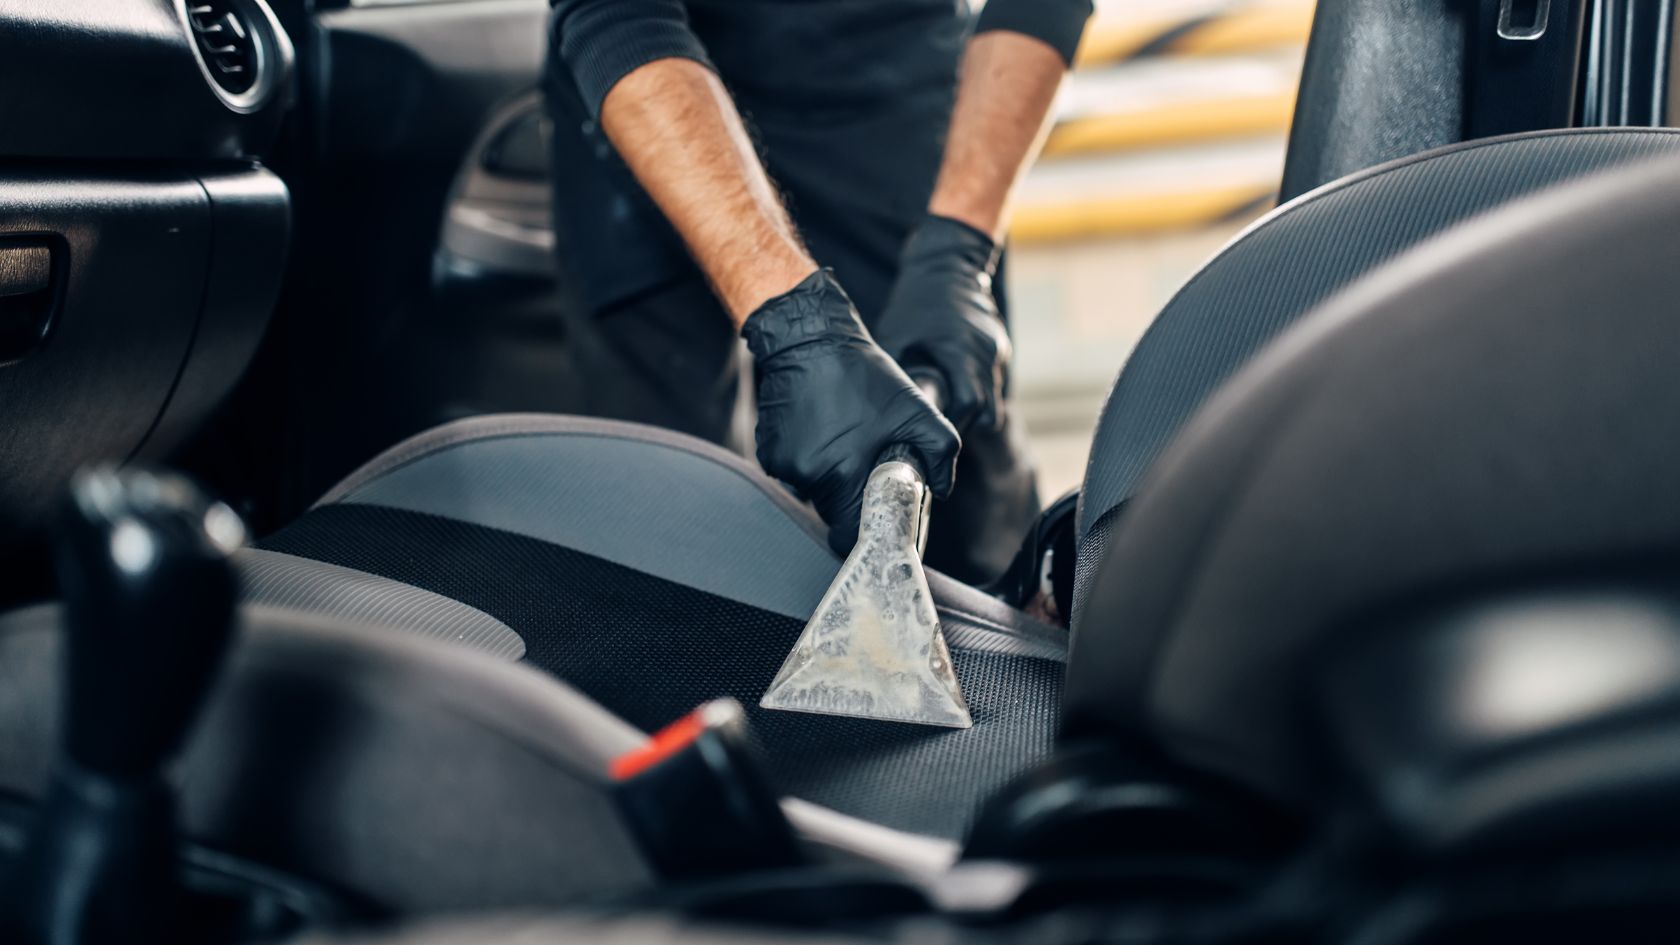
9 Must-Have Accessories for Your Car Vacuum Cleaner
A car vacuum cleaner plays a pivotal role in serving as a handy tool to keep your vehicle’s interior spotless. With its powerful suction capabilities and compact design, a car vacuum cleaner efficiently removes dirt, dust, crumbs, and other debris from hard-to-reach areas like seats, carpets, and crevices. To maximize its effectiveness, it is crucial to have the right accessories at your disposal. By equipping your car vacuum cleaner with these accessories, you can ensure a thorough and hassle-free cleaning experience while maintaining the cleanliness and hygiene of your vehicle. In this article, we will explore the 9 must-have accessories for your car vacuum cleaner. You will also learn about the importance and how to maintain these car vacuum accessories. Car vacuum cleaners are indispensable tools for maintaining a clean and hygienic car interior. These devices come in different types and feature sets to suit various cleaning needs. The most common ones are corded and cordless. Corded car vacuum cleaners provide consistent power and are ideal for heavy-duty cleaning, while cordless models offer enhanced maneuverability and portability. Many car vacuum cleaners boast powerful suction capabilities to effectively remove dirt, dust, crumbs, and pet hair from seats, carpets, and hard-to-reach areas. Features like brush attachments, crevice tools, and upholstery nozzles make it easier to tackle different surfaces and corners. A washable and reusable filter ensures continuous performance, while a compact and lightweight design allows for easy storage and handling. By choosing the right car vacuum cleaner with features/accessories that align with your specific cleaning requirements, you can effortlessly maintain a pristine car interior, promoting a comfortable and enjoyable driving experience. Accessories play a crucial role in enhancing the functionality and versatility of your car vacuum cleaner. These add-ons are designed to tackle specific cleaning challenges and ensure a thorough cleaning experience. Some of the examples are brush attachments that help loosen stubborn dirt, a crevice tool that reaches narrow gaps and corners, an upholstery nozzle that is ideal for cleaning fabric surfaces, and a flexible hose that provides extended reach. By utilizing the accessories, you can optimize the performance of your car vacuum cleaner and achieve exceptional cleanliness in your vehicle’s interior. But, for proper utilization, it is important to be aware and learn about each accessory. Crevice Tool Removing dirt, dust, and crumbs is a difficult task if they are stuck between hard-to-reach areas. These areas are also called crevices. The gaps you see between the seats, tight corners, and other tiny spaces in a car. The vacuum cleaner crevice tool is designed to reach such narrow gaps and tight corners. The crevice tool’s slim and elongated shape allows it to effectively navigate through challenging spaces. Secondly, the crevice tool has powerful suction that precisely ensures a thorough cleaning, eliminating dust, crumbs, and other particles that accumulate in hidden areas. Keeping every nook and cranny clean and tidy is hard especially if you travel frequently with kids and pets. By incorporating the crevice tool into your car vacuum cleaner routine, you can achieve a pristine and immaculate interior, ensuring a comfortable and hygienic driving experience. Upholstery Brush An upholstery brush could prove a vital accessory for the efficient cleaning of car interiors. While crevice is a useful accessory to suck the garbage, an upholstery brush provides perfect support in brushing the car seats, carpets, and mats. With its soft bristles, this brush effectively removes stubborn dirt, debris, and pet hair without causing damage to the upholstery which may otherwise get damaged with normal brushes. Regular vacuuming with an upholstery brush maintains cleanliness, prevents allergen buildup, and eliminates unpleasant odors. Moreover, this tool helps preserve the longevity and appearance of seats, carpets, and mats by preventing fiber flattening or wear. To maximize its benefits, vacuum regularly, address spills promptly, and use suitable cleaning products. Extension Hose Another valuable accessory of a car vacuum cleaner is the extension hose. When your standard vacuum attachments fail to reach specific areas extended hose does the needful by offering extended reach and flexibility. This additional hose often connects to the main unit, allowing you to clean areas that are further away or difficult to access. With the extension hose, you can effortlessly clean the back seats, trunk, or even the entire interior of your car without straining or contorting your body. The added length provides convenience and maneuverability, enabling you to reach every corner and cubicles. This accessory proves especially beneficial for those who own larger vehicles or need to clean expansive areas. Detailing Brush A detailing brush is often packaged with some of the dedicated car care kits. So, if you possess one then no need to invest in a separate brush. However, a car care kit and a vacuum cleaner won’t be complete without this accessory. A detailing brush offers numerous advantages in removing dust and dirt from intricate car surfaces. Unlike an upholstery brush which is primarily an upholstery cleaner, a detailing brush is a handy subordinate of a car vacuum cleaner to dislodge particles from hard-to-reach areas. Whether it’s cleaning air vents, dashboard crevices, or intricate trim, the detailing brush’s specialized design makes it an ideal tool for achieving a pristine interior. This brush comes in a compact size and is very gentle while cleaning, preventing scratches or damage to delicate surfaces. To ensure fresh and appealing car interiors include a detailing brush into your must-have items with a car cleaning vacuum. Pet Hair Attachment If you have pets for the company while travelling then you must have a pet hair attachment with your car vacuum cleaner. This is because the specialized attachment for pet hair removal is a game-changer when it comes to cleaning your car’s upholstery and carpets. A crevice tool or brush may not be able to extract tiny particles or pet hairs effectively. This is where pet hair attachment comes into the picture. Equipped with unique bristles or rubberized materials, it efficiently grabs onto pet hair and pulls it away from the fabric or carpet fibers.

How long does liquid car wax last? Unraveling the Lifespan of Liquid Car Wax
If you’re a car enthusiast, you know the importance of maintaining a pristine exterior. And that’s where car wax comes into play. If you are using liquid wax on your car exterior and don’t know how long does liquid car wax last then this is the post to read. In this blog, we’ll explore the fascinating world of car wax, focusing on the longevity of liquid wax and its benefits. We will cover various factors that influence the durability of liquid waxes. Additionally, we’ll dive into the age-old debate of liquid vs paste wax, dissecting their unique characteristics and helping you determine which is the ultimate contender for your car’s shine. You will also find answers to some of the common questions related to car waxing so, continue reading till the end! If it is about the expiry date of your liquid car wax then no need to worry. Experts recommend that you can use the same can of car wax for years to come. However, you can expect to see good results mainly in the first 2-3 years of its usage. Now, if it is about the longevity of wax on your car exterior then the answer is not straightforward. The lifespan of liquid car wax depends on various factors such as the quality of the product, environmental conditions, and how well it’s applied and maintained. On average, liquid car wax can provide protection and shine for around 2 to 3 months. However, some high-quality waxes may last up to 6 months or even longer. Regular maintenance, including washing your car with gentle products and avoiding harsh detergents, can help extend the longevity of the wax. Related Read: Why are car care products important Additionally, parking your vehicle in a covered or shaded area can shield it from the damaging effects of UV rays and prolong the wax’s durability. Remember, consistent application and proper care are key to maximizing the lifespan of your liquid car wax. As mentioned earlier, the longevity of wax on your car exterior depends on several key factors that require attention and regular maintenance. Let’s delve into these factors to ensure your wax stays intact and provides optimal protection and shine. Regular Maintenance: Consistent and proper maintenance is crucial to preserving the longevity of your car wax. If you are thinking that washing and applying the wax is enough to keep your car looking good forever then you are wrong. Regularly wash your car using a high-quality car wash shampoo or detergent. The quality of washing shampoo or detergent is important as inferior products may impact the existing as well as newly applied wax. Superior and reputed car wash shampoos help remove dirt, grime, and contaminants without deteriorating the wax over time. Quality of the Liquid Wax: The quality of the liquid wax you choose also plays a significant role in its longevity. Instead of cheaper versions, opt for a reputable brand that offers durable and long-lasting formulas. High-quality liquid waxes contain advanced polymers and ingredients that enhance durability and provide extended protection. Car Wax Application: Another important factor that is vital for the longevity of wax is the way it is applied. First of all, ensure your car’s surface is clean and dry before applying the wax. Use an applicator pad or cloth to spread the wax evenly, following the manufacturer’s instructions. Allow the wax to cure and bond with the paintwork before buffing it off. If the application process seems cumbersome take your vehicle to the professional car cleaning service rather than spoiling your car surface. Environmental Conditions: Environmental factors pertaining to excessive exposure to sunlight, extreme temperatures, harsh weather conditions, and pollutants can accelerate the breakdown of wax. Whenever possible, park your car in a shaded area or use a car cover to shield it from harmful elements. While you cannot control the weather and environment protecting your car exterior from their damaging impacts can increase the longevity of car wax. By paying attention to these factors, you can extend the lifespan of the wax on your car exterior, keeping it well-protected and maintaining its glossy appearance. Car wax serves as a protective shield for your vehicle’s paintwork. When applied appropriately to the exterior surface, car wax forms a transparent layer that acts as a barrier against environmental elements, such as UV rays, dirt, debris, and moisture. It also helps prevent oxidation and fading, preserving the color and shine of your car’s paint. Additionally, car wax offers hydrophobic properties, causing water to bead and slide off easily, making it easier to clean and reducing the chances of water spots. This protective layer also minimizes the adhesion of contaminants, making it easier to remove bugs, bird droppings, and tree sap. Overall, car wax enhances the longevity and appearance of your vehicle, giving it a lustrous and well-maintained finish. Generally, car wax takes anywhere from a few minutes to several hours to dry completely. In real-time, the drying time of car wax can vary depending on various factors such as the type of wax, environmental conditions, and the thickness of the wax application. Spray waxes and quick detailers, which are typically lighter in consistency, tend to dry relatively quickly. They usually dry within a few minutes, allowing for convenient and swift application. Paste waxes and liquid waxes, on the other hand, may require a bit more time to dry. It is recommended to let them sit on the vehicle’s surface for around 15 to 30 minutes, or as specified by the manufacturer. During this time, the wax forms a thin film as the solvents evaporate. External factors such as temperature, humidity, and airflow can affect the drying time of car wax. Warmer temperatures and low humidity levels generally facilitate faster drying, while colder temperatures and high humidity may prolong the drying process. To ensure that the car wax is fully dry, it is advisable to perform a touch test. Gently touch the waxed surface with your fingertips. If the wax feels dry to
Is hair shampoo safe for a car wash?
So, you found yourself in a situation where you desperately needed to wash your car but didn’t have any car soap/shampoo on hand. Sighting the urgency, you start wondering about using hair shampoo for washing. But, is hair shampoo safe for a car wash? If not, can you use body wash to wash your car? Or baby shampoo? Etc. After all, shampoos are designed to clean and lather so why not use any shampoo right? In this article, we’ll dive into the topic and explore whether hair shampoo or any shampoo/soap other than dedicated car wash products are safe to use on a car. You will also learn about the alternatives to car shampoos and find some of the answers to questions related to shampoos and car wash. Yes and no. If it’s a matter of occasionally using hair shampoo for car wash then yes you can. Hair shampoo is a competitive alternative to car wash shampoos and works really well if used appropriately. However, making a habit of using hair shampoo repeatedly for washing can generate problems for your car paint. Hair shampoo contains ingredients that may leave residues or streaks on your car’s surface. At the same time, hair shampoos lack the lubrication levels offered by dedicated car shampoos which could increase the risk of scratching the car’s paint during the wash. So, if it’s a one-time wash or part of an urgent plan then go ahead and use hair shampoo for washing your car. But, to protect and maintain your car’s original paint and wax avoid using it regularly. The simple answer is yes. This is because hair shampoos aren’t specifically designed and formulated for car wash. Will you use car shampoo to wash your hair? I am sure not. Similarly, using hair shampoo to wash your car may strip away the protective layer of wax on the paint. Hair shampoos contain harsh chemicals which if not thoroughly rinsed off, can leave behind residues that can dull the paint and cause it to look hazy. Secondly, hair shampoos have certain acidic pH levels to remain gentle on scalps. On the other hand, car paint prefers a more neutral or slightly alkaline environment that is helpful in preventing wax, protecting the paint, and keeping it shining. In a nutshell, hair shampoos can potentially damage car paint due to the chemicals and pH levels they contain. If you are still planning to use hair shampoo for car wash then here are some of the dos and don’ts tips to help you achieve better washing results: Dos Dilute the hair shampoo with water. The dilution ratio should be appropriate as overly concentrated liquid increases the risk of damaging the paint. Be gentle while applying the shampoo. To achieve proper gentleness use of a soft wash mitt or sponge is required. After washing with the shampoo, make sure to rinse your car thoroughly with clean water. This reduces the risk of streaks or spots from capturing the paint. Use soft and clean towels or microfiber cloths to dry your car’s surface. This helps prevent water spots and gives your car a polished finish. Don’ts Never use the shampoo straight on the car paint without mixing it in water. Don’t use hot water, as it can also affect the paint. Avoid scrubbing vigorously. Harsh scrubbing or using abrasive materials can lead to scratches or swirl marks on your car’s paint. Don’t leave the hair shampoo for extended periods on the car’s surface or even let it dry on your car’s paint. Such negligence could damage the protective coatings. Don’t skip waxing. Hair shampoos may strip wax from your car’s paint so ensure to reapply wax after washing to maintain protection and enhance the shine. Technically speaking yes you can use body wash to wash your car. It could be one of the other alternatives to clean your car one time. However, if you are thinking of doing it again and again then hold it. The body wash is formulated for use on human skin with a different pH balance, moisturizers, oils, and fragrances. These ingredients are great for human skin but not necessarily suitable for your car’s exterior surface. The long-time use of body wash chemicals and acids cause dullness of car paint. Moreover, body washes typically lack the lubrication properties found in dedicated car wash soaps and shampoos. Lubrication shortage could inadvertently result in scratches or swirl marks on your car’s surface. So, while it may be tempting to use body wash for car washing, it’s better to stick with a product specifically designed for washing your car. Well, it depends on your personal choice. If your baby is fine with it then go ahead and use it for car wash. Jokes apart! Baby shampoos are usually gentle with milder formulations and a neutral pH balance. That means it won’t be as damaging as an adult body wash or shampoo. As a useful alternative, baby shampoo can be on your list for a quick car wash. Again, it is not a natural cover-up for a traditional car wash liquid or soap. Since the additives and conditioners are minor in baby shampoos it won’t be strong enough to provide effective cleaning while washing your car. In summary, baby shampoo can be a viable option for a car wash but remember to exercise caution, and ensure proper lubrication during the washing process. More importantly, don’t make it a habit to use baby shampoo as a permanent solution for your car wash. There is no doubt that dedicated car shampoos are the best option to wash your vehicle. however, if you find yourself in a situation of washing your car in urgency without access to car shampoo or soap then here are some of the alternatives you can use: Dish soap – I am personally not in favor of using dish soap to clean a car nevertheless it remains one of the potential replacements for car shampoos. Dish soap is designed to cut