


Sound Deadening Materials in Cars are the need of an hour for those motorists who love listening to music and want to enjoy a peaceful driving experience.
These mats help create a tranquil cabin environment by mitigating external noises for drivers and passengers alike.
From the raw power of butyl to the insulating embrace of foam, each material of sound deadening contributes to creating an oasis of calmness within your car.
In this comprehensive guide, we delve into the diverse landscape of sound-deadening materials, exploring their various types and shedding light on the intricate process of installation.
The Role of Sound-Deadening Materials for Cars
Sound-deadening materials are primarily designed to reduce and absorb the noise generated by road vibrations, external elements, and even the vehicle’s own mechanical operations.
Related Read: How to soundproof car windows
These sound-deadening materials are crafted from various substances including rubber, foam, and vinyl.
To effectively minimize unwanted sounds, it is important to understand the material required for specific vehicles and their installation process.
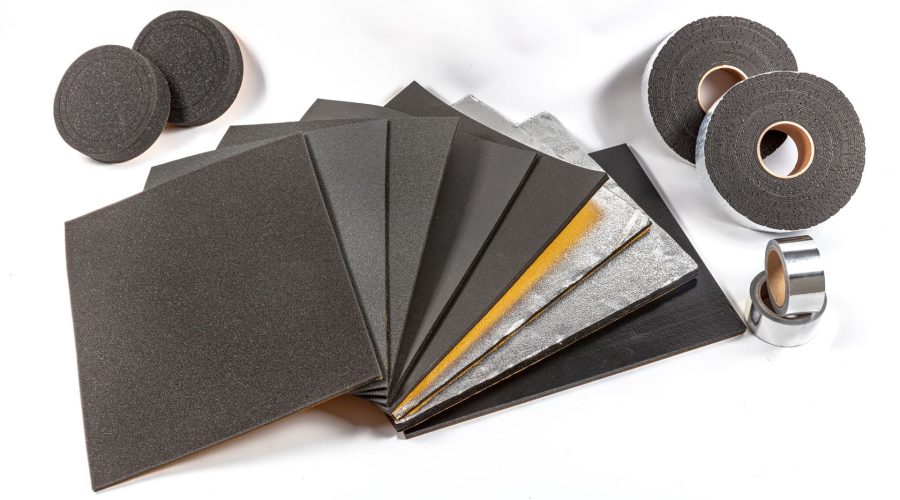
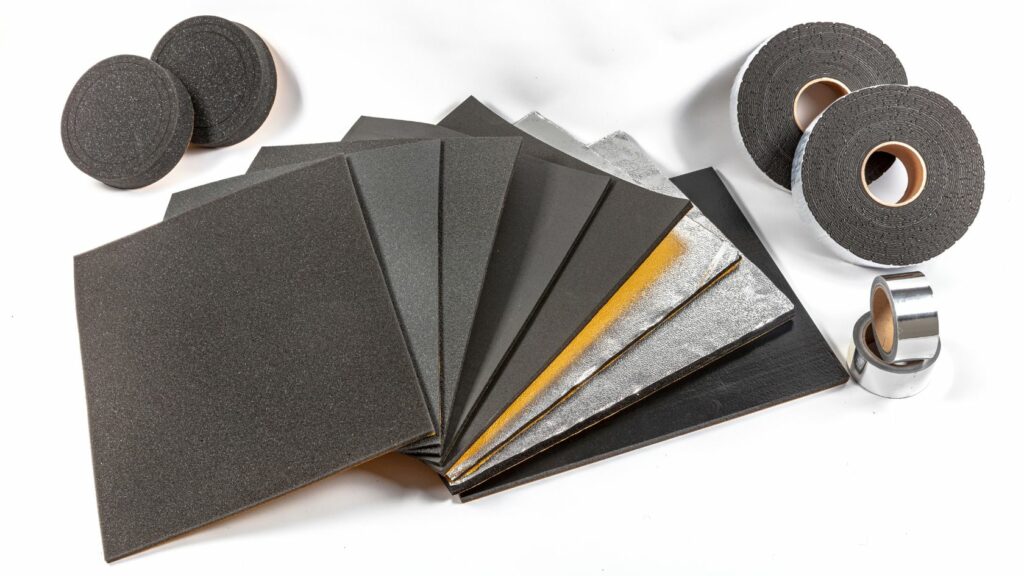
Different Types of Sound Deadening Materials
Butyl Rubber Mats
Among the most popular sound-deadening materials are butyl rubber mats. These mats are known for their exceptional noise-dampening properties because of their extraordinary thickness and high-quality foil. Both aspects matter when it comes to reducing the amplitude.
Butyl rubber is free of fillers and possesses thick annealed foil. Its tough resistance capabilities don’t allow it to melt easily. If you are looking to cover the effects of structural noise coming from the engine, exhaust, or tires then butyl material is the best option.
The mats made of butyl rubber are designed to adhere seamlessly to various surfaces within the car. They can be applied to the floors, doors, roof, and even the trunk area to create a comprehensive sound barrier.
Closed-Cell Foam Insulation
Closed-cell foam insulation is another viable option for sound deadening. This foam is adept at blocking out external noises while also providing thermal insulation.
Closed-cell foam made of polyethylene is highly suitable for sound dampening along with water retention and shock absorption.
Such foam insulation is already used in many industrial applications including construction, buildings, and packaging.
It can be strategically placed within cavities, behind panels, and even under carpets to create an additional layer of soundproofing.
As compared to butyl, closed-cell foam-based mats are highly efficient in curbing airborne sound waves. If used in isolation these mats are a great choice to have a luxurious feel and environment along with temperature and sound insulation.
Mass Loaded Vinyl (MLV)
For those seeking an extra layer of protection against sound intrusion, Mass Loaded Vinyl (MLV) is a valuable choice.
This dense and flexible material can be applied to various surfaces, serving as an effective barrier against airborne noise.
Talking of density, MLV made of heavy metal particles along with mass vinyl creates an effective sound-blocking mechanism. The limpness of MLV is another factor that prevents resonance and absorbs noise vibration softly.
MLV mats are versatile and flexible making them suitable for areas where other materials might be challenging to install.
It is perfect for those seeking a controlled car environment from airborne noises and sound waves appearing from the gaps.
Whatever material you choose the effectiveness lies in their installation process. This is what we will cover in the next section.
The Installation Process: Application Techniques for a Quieter Ride
The installation process of sound-deadening mats requires attention to detail and a strategic approach.
While the specifics may vary based on the material and your vehicle’s model, the general process involves the following steps:
Before you begin the installation process, gather the following tools and materials:
- Sound-deadening material sheets
- Utility knife
- Roller tool
- Cleaning supplies
- Marking pen
- Adhesive promoter (if recommended by the manufacturer)
Cutting and Placement
Measure the dimensions of the car floor, door, roof, and trunk, and cut the sound-deadening mats to fit precisely.
Start with larger sections and trim as necessary to ensure a snug fit. Carefully adhere the mats to the designated surfaces, pressing firmly to eliminate air bubbles and ensure secure attachment.
Car Floor
Step-by-Step Installation Guide
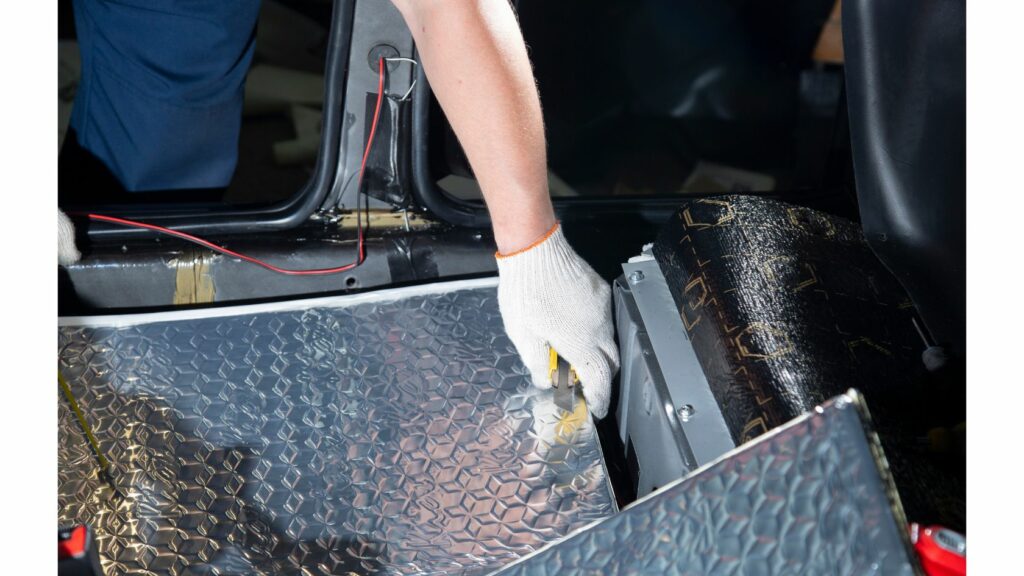
- Start by removing the seats and carpet to expose the car floor. This will provide you with a clear and accessible surface to work on.
- If your car floor has irregularities, consider using additional foam insulation to level out the surface before applying the sound-deadening material.
- Use cleaning supplies to remove dirt, dust, and grease from the car floor. A clean surface is essential for the proper adhesion of the sound-deadening material.
- When encountering obstacles like wiring or braces, cut the sound-deadening material into smaller pieces to fit around them without compromising coverage.
- For curved areas, make small relief cuts in the material to help it bend smoothly without forming wrinkles.
- Peel off the backing of the sound-deadening material sheet for application.
- Carefully apply the material to the car floor, starting from one end and pressing it down firmly as you go.
- Go over the applied material with the roller tool at least twice to eliminate any air bubbles and ensure a secure bond to the car floor.
- Trim any excess material along the edges and around the obstacles to create a neat and professional-looking installation.
Car Doors
Step-by-Step Installation Guide
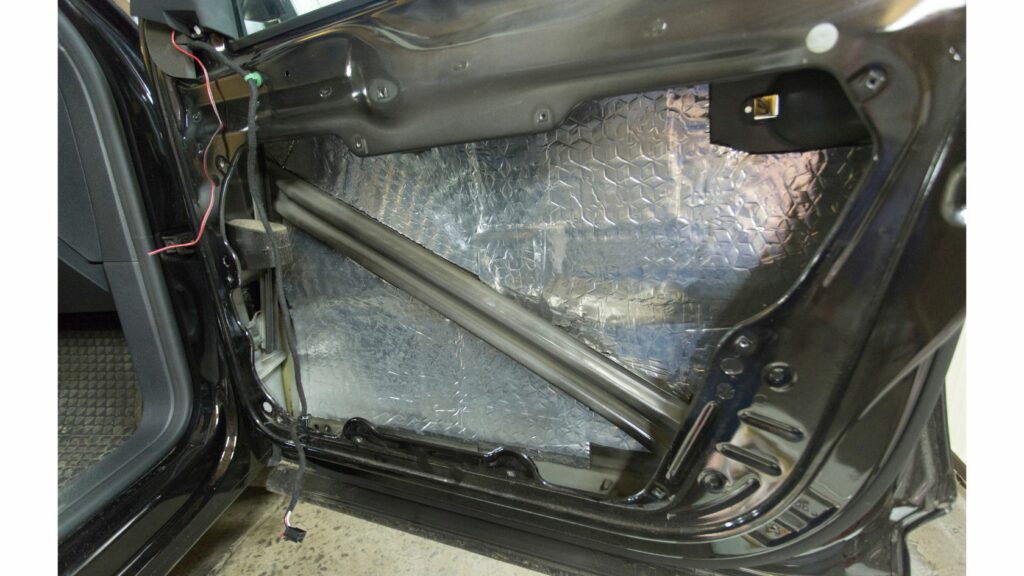
- Use a trim removal tool to gently pry open the clips securing the door panel. Once the clips are released, carefully lift and remove the panel.
- Carefully cut around the handle and lock mechanisms to ensure they function properly without obstruction.
- Clean the interior of the door using cleaning supplies to remove any dirt, dust, or grease that might hinder the adhesion process.
- Cut the sound-deadening material into appropriately sized pieces for each section of the door.
- If your door has speaker openings, cut precise holes in the material for a clean fit. This allows the sound to pass through while still benefiting from the insulation.
- Apply the material to the door, starting from the bottom and working your way up.
- Once the application is complete, use a roller tool to press the material firmly and ensure there are no air pockets hindering a secure bond.
- Reattach the door panel by aligning the clips and gently tapping them back into place. Ensure all clips are secure.
Car Roof
Step-by-Step Installation Guide
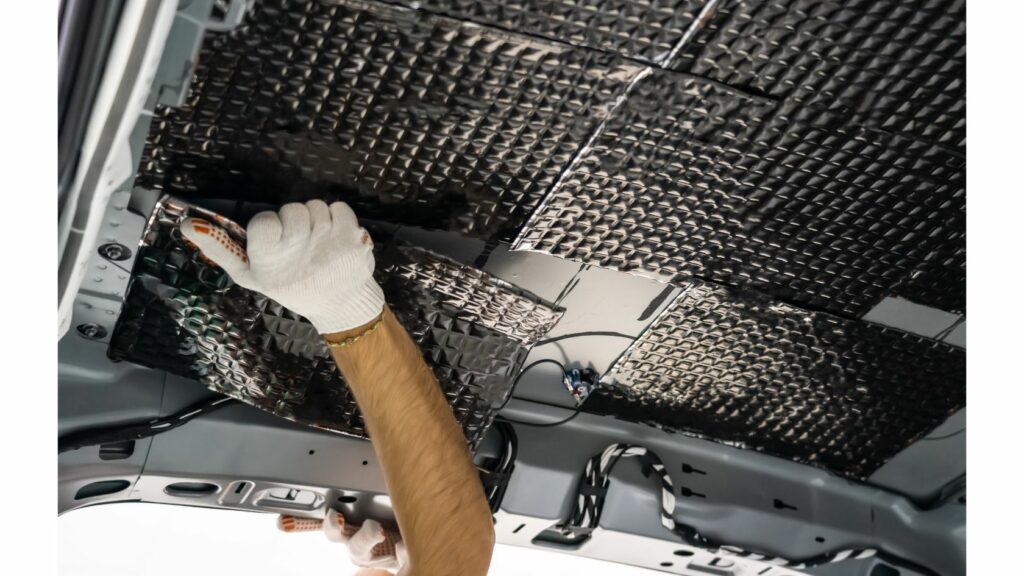
- Remove any items from the interior of the car, such as sun visors or handles, that might obstruct the installation process.
- If your car has interior lights on the roof, consider removing them temporarily to ensure a precise application of the sound-deadening material.
- Clean the roof thoroughly using cleaning supplies for proper adhesion.
- Cut the sound-deadening material sheets to match the roof area and adjust the curved area with small relief cuts in the material.
- Take care of sunroofs and antennas, ensuring they continue to function properly.
- Apply the sound-deadening material pieces to the roof one by one.
- Run the roller tool over the applied material to ensure a secure bond and eliminate any remaining air bubbles.
- Reattach any interior items that were removed and ensure they are secured. Test the difference in noise levels by taking your car for a drive.
Car Trunk
Step-by-Step Installation Guide
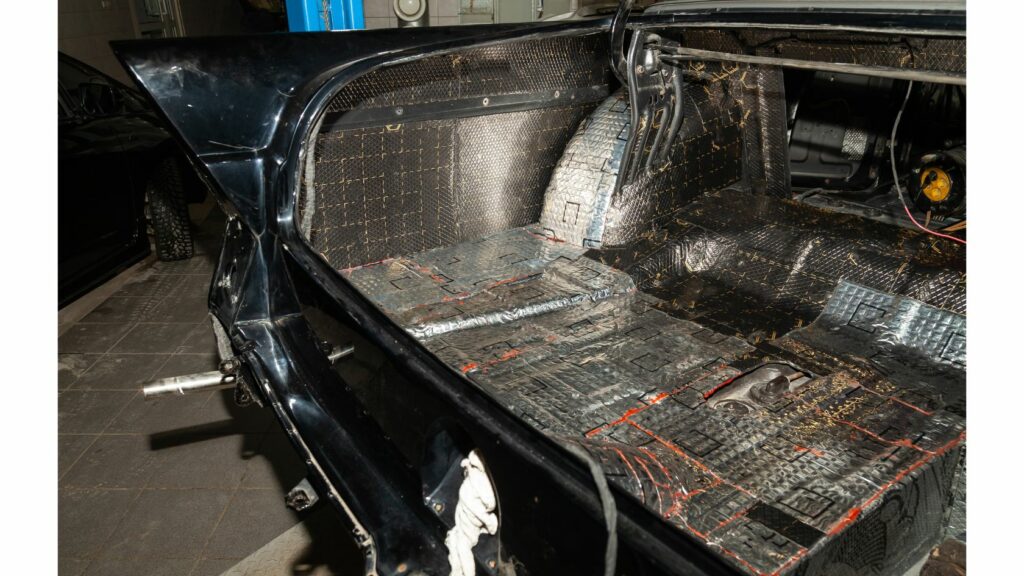
- Remove any items from the trunk, including spare tires or tools, to provide easy access to the trunk interior.
- Clean the trunk interior using cleaning supplies to remove obstacles that might affect adhesion.
- Cut the sound-deadening material sheets to match the dimensions of the trunk area. For curved trunk areas, make small relief cuts.
- Cut precise openings in the material to accommodate mounting brackets or other structural elements present in the trunk.
- Apply and press down the material firmly to the trunk.
- If your trunk has a spare tire compartment, ensure that the sound-deadening material is applied carefully around its contours.
- Make use of the roller tool on applied materials for secure bonding.
Sealing Edges and Gaps
To maximize the effectiveness of the sound-deadening mats, seal any edges, corners, or gaps using specialized sealants or adhesives. This step ensures a complete barrier against noise intrusion.
Testing and Reassembly
After installation, test the fit of various components, such as panels, carpets, and seats, to ensure that they align properly. Reassemble any removed parts and take note of the difference in noise levels as you embark on a test drive.
With sound-deadening material strategically placed on car floors, doors, roofs, and trunks, you’re well on your way to creating a serene driving environment that complements the road ahead.
Benefits of Proper Installation
Properly installed sound-deadening materials result in a quieter cabin, free from the intrusion of external noises.
Vibrations from the road, engine, and other sources are significantly minimized, creating a more serene driving environment.
Moreover, the enhanced insulation contributes to improved climate control and temperature stability inside the car.
Final thoughts
Incorporating sound-deadening materials in your car goes beyond mere luxury; it’s a tangible investment in elevating your driving experience.
By exploring the diverse array of materials available and mastering the art of installation, you can transform your vehicle into a haven of tranquility on the road.
Whether it’s the floor, door panels, trunks, or roof, each application adds to the overall effectiveness of noise reduction.
Following the installation techniques from this post, you can create a quieter, more enjoyable ride.
As you navigate the bustling streets and highways, the difference in noise levels will serve as a testament to your commitment to comfort and serenity.
2 Comments
Thank you for explaining the differences in sound deadening choices. It was easy to understand the installation process with your step by step instructions and pictures. great job!
Hey Kim,
Glad to hear that. Thanks for visiting the website and sharing your valuable thoughts on sound deadening material for cars.