
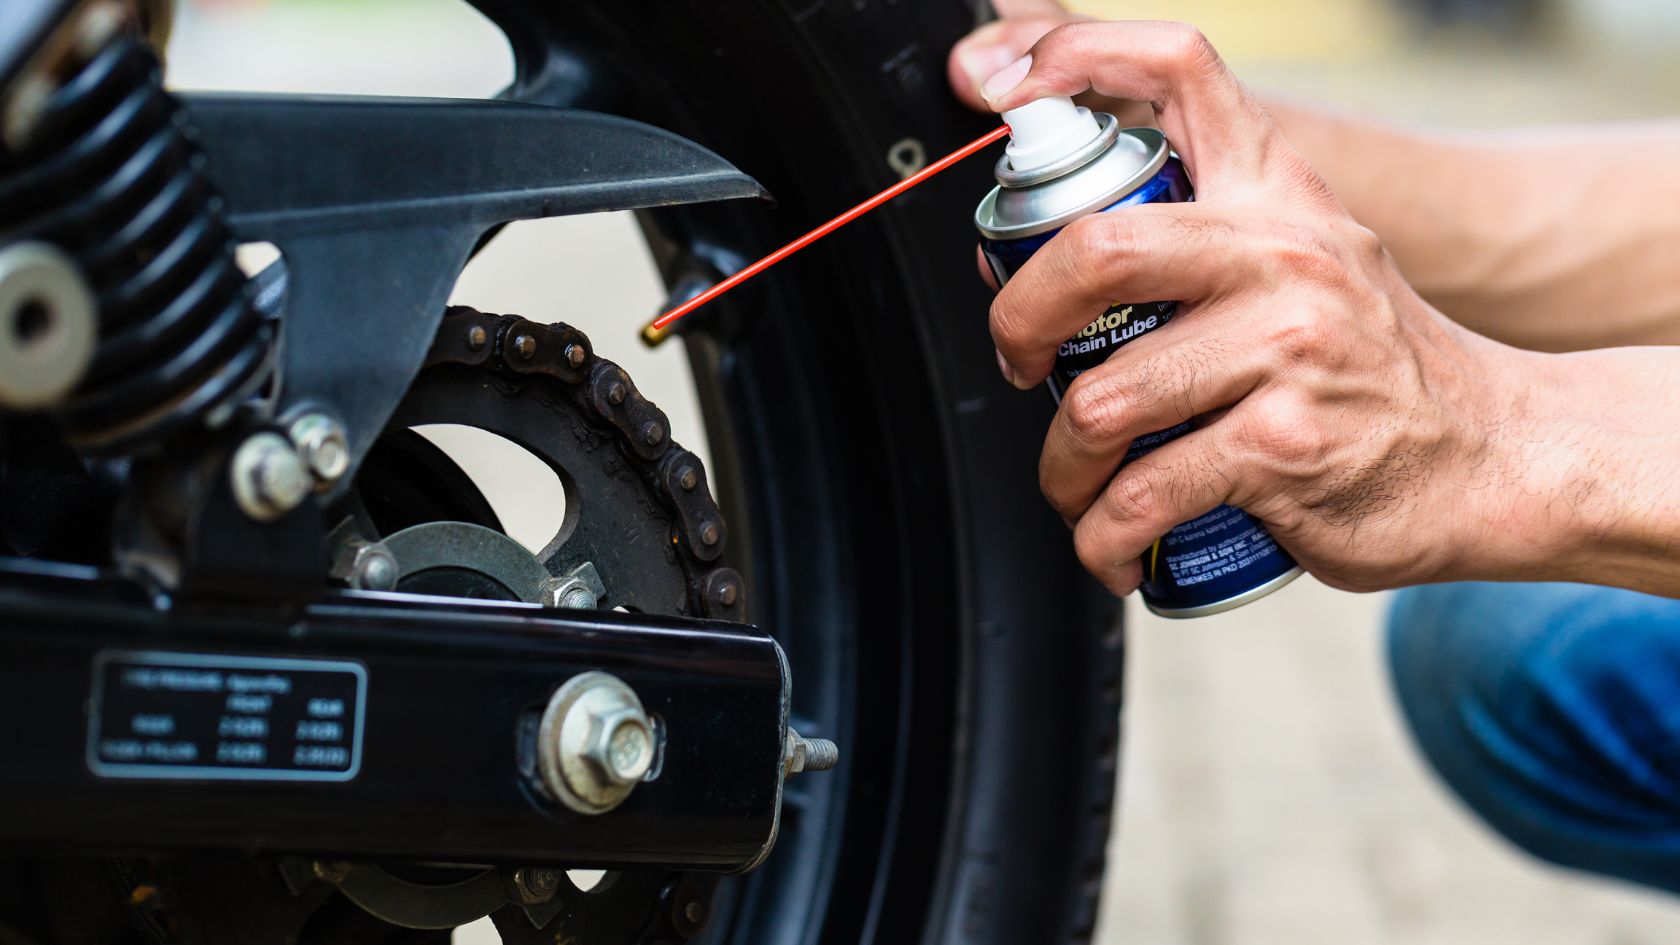
Keeping a motorcycle chain gleaming and glistening with cleanliness is important for a smooth ride. This is where the importance of a top-notch motorcycle chain cleaner kit comes into play. In this guiding post, we will explore the key features to consider in these kits, unveil our top recommendations, and guide you through the essential steps to ensure your motorcycle’s chain stays clean and well-lubricated. So, continue reading to uncover the best options to keep your motorcycle chain in top form. Your motorcycle’s chain is a critical component of its drive train, responsible for transferring power from the engine to the rear wheel. So, what happens if you don’t clean it on a regular basis? Well, a dirty chain not only disrupts the transfer of power but also poses a series of underlying problems: And why does it happen? If a motorcycle chain remains dirty, it demands more effort from your engine. More demand means more fuel. You’ll find yourself stopping for gas more often than enjoying the ride. These scenarios aren’t about inconvenience; they are a clear example of why cleaning your motorcycle chain is absolutely essential. A clean and well-maintained motorcycle chain ensures that your rides remain smooth, efficient, and safe. But why chain cleaners? Using dedicated motorcycle chain cleaners, lubricants, and waxes offers several distinct advantages over alternative cleaning agents like kerosene or petrol. Here are four key benefits of using professional motorcycle chain cleaning products: Chain-Specific Formulation – Professional motorcycle chain cleaners are specifically formulated to clean and protect chains without causing harm. These solutions are designed to dissolve dirt, grime, and old lubricants from the motorcycle chain. While doing so, the formulation of these products remains gentle on the chain’s metal surfaces. Using kerosene or petrol, on the other hand, may clean the chain but can also strip it of essential lubrication, leading to accelerated wear and tear. Preserves Chain Integrity – If the formula is gentle it helps in preserving the integrity of any item. The same applies to motorcycle chains. These two-wheeler metals are subjected to high levels of stress and friction during operation. Using a dedicated cleaner is like giving your motorcycle chain the right type of oil, ensuring smooth operation and longevity. They not only remove dirt but also provide the necessary lubrication to reduce friction and prevent premature wear. Minimizes Environmental Impact – Many motorcycle chain cleaners are often designed with biodegradable formulations to be environmentally friendly. While working with them, you remain protected from the risk of harmful chemicals contaminating the soil or water when disposing of residue. In contrast, using harsh chemicals like petrol can have detrimental effects on the environment as well as your own health. Enhances Chain Performance – This is more important! A majority of dedicated chain cleaners come with advanced additives that not only clean the chain but also improve its performance. The additives may include anti-corrosion agents and friction modifiers that reduce wear, increase efficiency, and extend the life of your chain. Think of a quality chain cleaner as a performance booster for your motorcycle—a little extra care for a smoother, more enjoyable ride which alternative cleaning agents do not provide. Now that you know the importance and benefits of using motorcycle chain cleaning kits here are the 3 best options that will make your motorcycle chain life easier. As an Amazon Associate, we may earn a small commission if you purchase any product by clicking the link without any additional cost to you. Motul Motorcycle Chain Clean Lube Kit The Motul Motorcycle Chain Clean Lube Kit is a complete solution that will help you keep your motorcycle’s chain in pristine condition. Designed with precision and performance in mind, this kit offers everything you need to maintain your power sports machine and equipment with ease. Cleaning your motorcycle chain is the first important step. To fulfill this, Motul’s chain cleaner does an excellent job. It features a chlorine-free formula that effortlessly cuts through encrusted deposits, making chain cleaning a breeze. Similarly, this kit also offers a chain lubricant that is specifically formulated to meet the demands of speed and endurance racers. Its advanced formula ensures optimal lubrication, reducing friction, and extending the life of your chain. In terms of usage, expect to witness excess liquid release so be gentle while spraying to avoid wastage. While the solution is very effective, the size of cans and bottles may not suffice for long-term usage. Some of the other components included in the kit are a chain brush and nitrile gloves. Both items are vital for efficient cleaning and safety. With a brush in hand, you can ensure that your chain is thoroughly cleaned, and with gloves, you can keep your hands protected during the cleaning and lubrication process. Moreover, you don’t have to worry about storing all these things separately as the kit is offered with a convenient storage bag. Clenzoil Chain Cleaning Oil & Tool Kit For motorcyclists and cyclists who demand a comprehensive solution to bike chain maintenance, the Clenzoil Chain Cleaning Oil & Tool Kit emerges as a one-stop, all-inclusive package. This high-quality kit is designed to offer a dual-action solution. The dual-action formula of the Clenzoil cleaner and lubricant streamlines the maintenance process, making it accessible for motorcyclists of all levels. It leaves your chain with a protective film, reducing friction and promoting longevity. One standout feature is the kit’s formulation with rust and corrosion inhibitors. This provides ultimate protection even in extreme weather conditions, including coastal salt air. You can trust your chain to stay clean, lubricated, and rust-free in the harshest environments. The kit includes a microfiber towel for wiping down your chain after using the cleaner and lubricant, ensuring a pristine finish. It also provides brushes to help you reach intricate areas however it is not designed perfectly to fit different types of chains. So, you may have to use other alternatives for brushing, maybe a toothbrush! The good thing about this kit is it does what
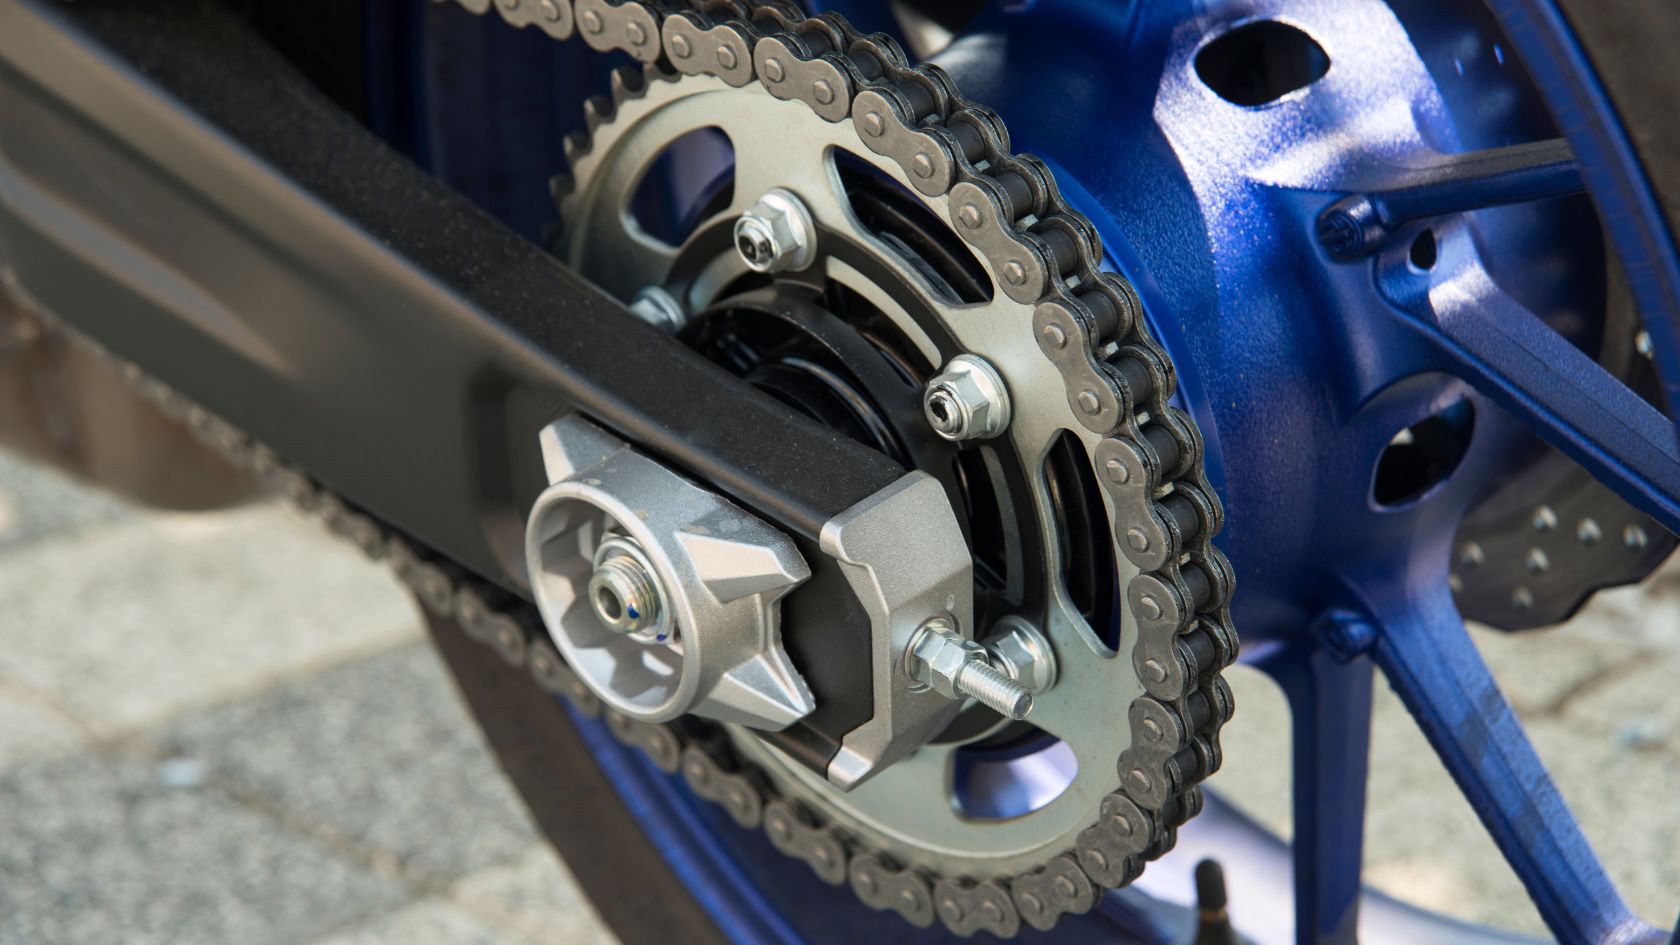
The Ultimate Guide to Cleaning Your Motorcycle Chain With and Without a Stand
A well-maintained motorcycle chain can be the difference between a smooth, worry-free ride and unexpected breakdowns on the highway. So, how often should you clean and lube a motorcycle chain? Moreover, can you clean a motorcycle chain without a stand? The motorcycle chain is often overlooked in the process of regular maintenance. So, whether you’re an amateur rider or a seasoned enthusiast, it’s time to dive into motorcycle chain maintenance. In this comprehensive guide, we will unravel the secrets of keeping your motorcycle chain in tip-top shape. We’ll explore why a clean chain is crucial for your safety and your bike’s performance with some practical DIY methods and additional tools. We’ll also examine the possibility of cleaning and lubing a motorcycle chain without a stand. Cleaning a motorcycle chain without a stand is possible but not without the potential risks. Without a stand, the motorcycle is not stable. This means working with a risk of motorcycle tipping on you or anywhere else which could be dangerous. Lack of security increases the risks of unexpected movement and may even cause accidents. Secondly, an unstable motorcycle is more challenging to access all parts of the chain. Even if you manage to mitigate the risk of movement, you may not be able to move or reach all the sections of a chain for thorough cleaning. While there are risks associated with cleaning and lubing a motorcycle chain without a stand, these risks can be minimized by following safety precautions and using DIY methods which we have covered in the below section. In the absence of a regular motorcycle stand, here’s how to clean and lubricate your motorcycle chain without a stand: Use a Paddock Stand A Paddock Stand can be a valuable tool for elevating the motorcycle. You can find multiple options for Paddock Stand in the aftermarket segment. Simply, place the paddock stand under the rear swing arm and lift the rear wheel off the ground. Side Stand Leaning If you don’t want to buy or use a Paddock Stand, another option is to lean your motorcycle on a side stand. If your motorcycle has a side stand, park it on level ground and use a sturdy object like a brick or wooden block under the side stand to gently lean the bike to the opposite side. This raises the rear wheel, allowing you to rotate it for chain maintenance. Ask For Help If both the above options don’t work for you then you have to take some help from others. If you have a willing friend or family member, they can help by holding the motorcycle upright while you clean and lubricate the chain. Ensure that both of you are wearing protective gear. Homemade Cleaning Stand You can also look to create a makeshift cleaning stand using a sturdy, elevated platform, like a stack of wooden pallets or a workbench. It could be time-consuming but definitely cost-saving. Ensure it is stable and that the motorcycle is secure on it. By using any of the above methods, you can elevate the rear wheel to rotate it. Just push the bike forward by spinning the wheel by hand to gain access to different sections of the chain for cleaning and lubrication. Additional Tips for Ensuring Safety While Cleaning Without a Stand Once you have found a suitable standing option make sure to follow the step-by-step process we have covered below. It is important to have the essential tools and materials needed for cleaning and maintaining your motorcycle chain. Here’s a checklist of what you will need: Preparations Before Cleaning Cleaning your motorcycle chain isn’t just about scrubbing away dirt; it’s about setting the stage for a successful maintenance session. Before you dive into cleaning, selecting the right location for chain maintenance is vital. Ideally, you want a spot with good lighting, ventilation, and enough space to move around your bike comfortably. If you’re using a stand, make sure it’s on a stable surface. Next, turn off the engine. This not only prevents any accidental engagement of the gears but also enhances safety during the process. Inspecting the Chain When it comes to inspecting the chain, rotate the rear wheel slowly to observe the tight spots. These are the areas where the chain doesn’t move smoothly and may appear to “jump.” These can indicate improper chain tension or wear. Similarly, if the chain looks dry or has a buildup of gunk, it’s a sign that cleaning and fresh lubrication are also needed. Follow the below steps to clean and lube the motorcycle chain appropriately: Step 1: Cleaning the Surrounding Area Before you begin the process of cleaning, don’t forget to wear protective gear such as safety gloves and glasses. The safety products can shield you from chemical liquids and debris which can otherwise be harmful to your health. Once you are ready, start by cleaning the area around the chain. This prevents contaminants from getting into the chain during cleaning. Use a rag or paper towel to wipe away loose dirt and debris. The other item you want to use here is a cleaning brush. A wire brush can come in handy to scrub the chain between the links and rollers for a thorough cleaning of loose dirt and grime. Step 2: Using a Chain Cleaner A chain cleaner or kerosene should be your ally to make the chain ready for proper adhesion and lubrication. Apply the necessary cleaner or degreaser to the chain by following the product’s instructions. Again, use a brush to scrub the chain while the cleaner is applied. This will help you break down stubborn grease and grime from the chain. Now, use some water with a low-pressure hose or a bucket to rinse off the chain cleaner. Ensure there is no residue left. If the chain looks still greasy after using water, scrub it once more with the cleaning brush and keep applying water till the cleaner is washed away. Finally, use a rag or microfiber towel to

Distorted Vision on Car Windshields: Causes and Solutions
Blurry vision and glare are common issues on car windshields that most drivers encounter while driving. However, there is another vision-hindering problem often faced and ignored by motorists – distorted vision on car windshields! So, what causes distorted vision and how you deal with it appropriately is the main topic of this blog post. Is it improper installation of the windshield during initial setup or as an aftermarket solution? Or has it got something to do with your eyesight? We will answer the above questions and explore the intricate details of windshield installation and its potential consequences. We’ll also unravel other underlying factors contributing to your distorted vision, along with expert-backed windshield replacement strategies that will help you regain a crystal-clear view of the road. So, stay tuned till the end! Distorted vision on car windshields refers to a visual impairment experienced by drivers when their windshield is compromised with some defects or issues, resulting in a distorted or unclear view of the road. An example of distorted vision is watching objects moving or changing shape due to glass refraction. Here is a short video of a distorted windshield in the form of refraction: This phenomenon can occur due to various factors, such as improper installation during windshield replacement or initial manufacturing defects. Optical aberrations, like astigmatism or lens distortion, may also contribute to this issue. It is crucial to note that driving with a distorted view poses significant safety risks, as it affects your ability to assess distances accurately and identify potential hazards. To tackle this problem, it’s important to be aware of the causes and promptly address them for a clear and safe journey on the road. A clear and unobstructed view through your car windshield is essential for safe driving, but at times, vision distortion due to the following causes can compromise this crucial aspect: Manufacturing Defects – In rare instances, windshields may have inherent manufacturing defects that lead to imperfections in the glass. These defects can cause slight distortions, affecting the driver’s ability to see the road clearly. As an example, low spots difficult to wipe through windshield wipers after installation is a sign of a manufacturing defect causing warping or distortion. While these occurrences are uncommon, they highlight the importance of quality control in windshield production. Improper Installation of Windshields – The way a windshield is installed can significantly impact its performance. Improper installation may result from incorrect techniques, inadequate tools, or rushing through the process. As a consequence, the windshield might not fit properly or may become misaligned, leading to distortions in the driver’s field of view. For instance, if a windshield is not aligned with the vehicle’s frame during installation, it may cause a slight bending effect, making objects appear elongated or distorted. Leaks on the Edges of Windshield – When the edges of a windshield are not sealed correctly, moisture can seep through, leading to leaks. These leaks can introduce water between the layers of the glass, causing foggy patches and impairing visibility. As a result of unsealed edges, water droplets may accumulate between the layers of the windshield, creating a blurry effect that hinders the driver’s sight during heavy rainfall. Not Wearing Safety Gear – During windshield installation or replacement, technicians must adhere to safety protocols, including wearing proper protective gear. Failure to do so might result in chemical exposure or injury, which can compromise the quality of the installation. If a technician does not wear protective gloves while handling adhesive, the adhesive might come into contact with the skin and cause irritation, leading to improper application and distortions in the windshield. Similarly, existing grease or oil from a technician’s hand can mix up with the adhesive which can later impact the clarity of the windshield. Non-removal of Old Adhesive – When replacing a windshield, it is crucial to remove the old adhesive completely. Neglecting this step may create gaps between the windshield and the vehicle frame, allowing air and moisture to penetrate, causing visual distortions. If the old adhesive is not adequately removed, it might interfere with the bonding process of the new windshield, leading to visible distortions along the edges. Grime or Debris on Windshield – Do not underestimate the impact of external factors like grime or debris on the windshield. More often these can obstruct the driver’s view and create distortions. As an example, a layer of dirt or dust on the windshield can scatter light, causing glare and making it challenging to see the road clearly, especially during sunny days. Related Read: How to reduce glare on your car windshield Regular cleaning and maintenance are necessary to avoid this issue. Low-Quality Aftermarket Windshield – Many glass manufacturing companies offer sub-standard windshields with uneven thickness, leading to inconsistent refraction of light and visual distortions. Such windshields may not meet the necessary standards, resulting in subpar performance and potential distortions. Opting for a low-quality aftermarket windshield might save money initially but can lead to long-term issues. Eyesight Problems or Lens Issues – Sometimes, drivers may mistakenly attribute vision distortion to the windshield when the problem lies with their own eyesight. Uncorrected eyesight problems such as astigmatism or lens issues in eyeglasses can make objects outside the car appear distorted. For example, if a driver has astigmatism and does not wear corrective eyeglasses or contact lenses while driving, they may experience distorted vision, mistakenly attributing it to the windshield. Driving with a distorted view through your car windshield can be frustrating and hazardous. However, there are practical steps you can take to reduce or even eliminate this distortion and ensure a clear and safe driving experience. Proper Installation and Repair Ensure your windshield is installed correctly by qualified professionals. Some signs of incorrect installation are rattling noises, irregular patterns, and gaps in the frame. Address any installation issues promptly, including leaks and gaps, which can lead to visual distortions. Regular Cleaning Keep your windshield clean from grime, dirt, and debris. Regularly wash both the interior and exterior of the

How car windows affect Aerodynamics and fuel consumption
When the weather is pleasant or you simply want to enjoy the breeze, rolling down the car windows seems like a natural choice. However, have you ever wondered how car windows affect aerodynamics and fuel consumption in automobiles? You might not give it much thought, but your car’s windows are a critical factor influencing its aerodynamic profile. The aerodynamics plays a pivotal role in determining a car’s efficiency and performance. The decisions you make about your car windows could potentially affect the speed and fuel efficiency. In this blog, you will learn about car aerodynamics, and explore the significance of open windows vs. air conditioning. You will also know about the effects of open windows and discover the hidden secrets that can improve your ride and save you money on fuel. Automobile aerodynamics is all about how air interacts with a vehicle, affecting its performance, efficiency, and stability. It’s a complex study of the forces between the vehicle’s shape and the surrounding air while in motion. In the absence of proper aerodynamic design, a vehicle is bound to move with drag and turbulence. Therefore most modern cars are designed with streamlined shapes to minimize drag, which also improves fuel efficiency. Understanding parameters like the coefficient of drag (Cd) which is used to measure the air resistance and lift is crucial for gauging a car’s ability to cut through the air smoothly. Engineers utilize wind tunnel testing and computational fluid dynamics (CFD) to optimize designs, reducing air resistance. Better aerodynamics results in improved fuel economy, reduced noise, enhanced handling, and higher top speeds. Imagine a cyclist crouching low to reduce air resistance and pedal more efficiently – that’s a basic example of aerodynamics in action! But is the design of a vehicle enough to sustain the airflow or does it also depend on other aspects such as opening or closing of windows while driving? Yes, open car windows do have an impact on both aerodynamics and fuel consumption but not to a significant extent. When you drive with your car windows down, it creates additional drag, hindering the smooth flow of air around your vehicle. This increased drag leads to a reduction in the car’s overall speed and fuel efficiency, as the engine has to work harder to compensate for the resistance. The extent of this impact varies depending on factors like the vehicle’s speed, window size, and design. In contrast, using air conditioning while driving may lead to improved aerodynamics, as the windows remain closed, reducing drag and potentially saving fuel. So, if fuel efficiency is your priority, consider using air conditioning on the highway, but for a leisurely drive in the city, fresh air through open windows can be more enjoyable. Opening car windows can lead to several effects that are crucial to understand for any driver. Effects on Aerodynamics: The impact of driving with open windows goes beyond the fresh air you breathe. While it’s great for ventilation, it can adversely affect the car’s aerodynamics. When the car is in motion, air encounters the open windows, creating turbulence that disrupts the smooth flow of air around the vehicle. This turbulence leads to an increase in drag, hindering the car’s aerodynamic efficiency. Imagine driving with open windows as swimming against the current in a river. The resistance you feel makes it harder to move forward efficiently. Impact on Fuel Consumption: The impact of open windows on fuel consumption is notable. When windows are open, the increased drag creates resistance, compelling the engine to exert more effort to sustain the desired speed. This additional workload demands more fuel consumption, resulting in reduced fuel efficiency and frequent re-fueling. To better comprehend this, consider the analogy of riding a bicycle with the wind against you. As the wind resistance grows, pedaling becomes more laborious, and you use more energy to cover the same distance. Similarly, open windows force the engine to burn more fuel to overcome the increased drag, ultimately affecting your car’s fuel economy. Speed Reduction: One of the critical consequences of increased drag due to open windows is the reduction in speed and acceleration of the car. As the vehicle moves forward, the open windows create turbulence, causing the air to resist the car’s motion. This resistance slows down the car’s acceleration and hampers its ability to achieve higher speeds efficiently. As an example, when you try to run against a strong headwind, your progress becomes sluggish, and you struggle to maintain your usual speed. Similarly, with open windows, the increased drag acts as that headwind, affecting the car’s overall performance, particularly at higher speeds. Note: While open windows can affect fuel consumption, they are often more fuel-efficient than using air conditioning at low speeds or during city driving. Finding a balance between enjoying the breeze and preserving fuel efficiency is the key. Improving the aerodynamics and fuel efficiency of your car can lead to a smoother ride and substantial cost savings over time. Here are some practical tips to enhance your driving experience: Streamline Your Vehicle One effective way to enhance your car’s aerodynamics and fuel efficiency is by streamlining the vehicle’s design. Now this doesn’t mean changing the shape and size of your vehicle but refers to optimizing the shape and external features to reduce air resistance and drag. This can be done by removing any unnecessary external attachments like roof racks or spoilers in some cases, as they can create turbulence and increase drag. A practical example to understand this is a cyclist with a backpack. When the cyclist removes the backpack, they experience less resistance and can pedal more effortlessly. Similarly, by streamlining your car’s exterior and keeping it clean and well-maintained, you can improve its aerodynamics, enabling better fuel efficiency and a smoother driving experience. Choose the Right Tires When aiming to improve your car’s fuel efficiency, choosing the right tires can make a significant difference. Opt for low rolling resistance or narrower tires, which are specifically designed to minimize friction with the road
Does laminated glass crack in automobiles? A comparative guide
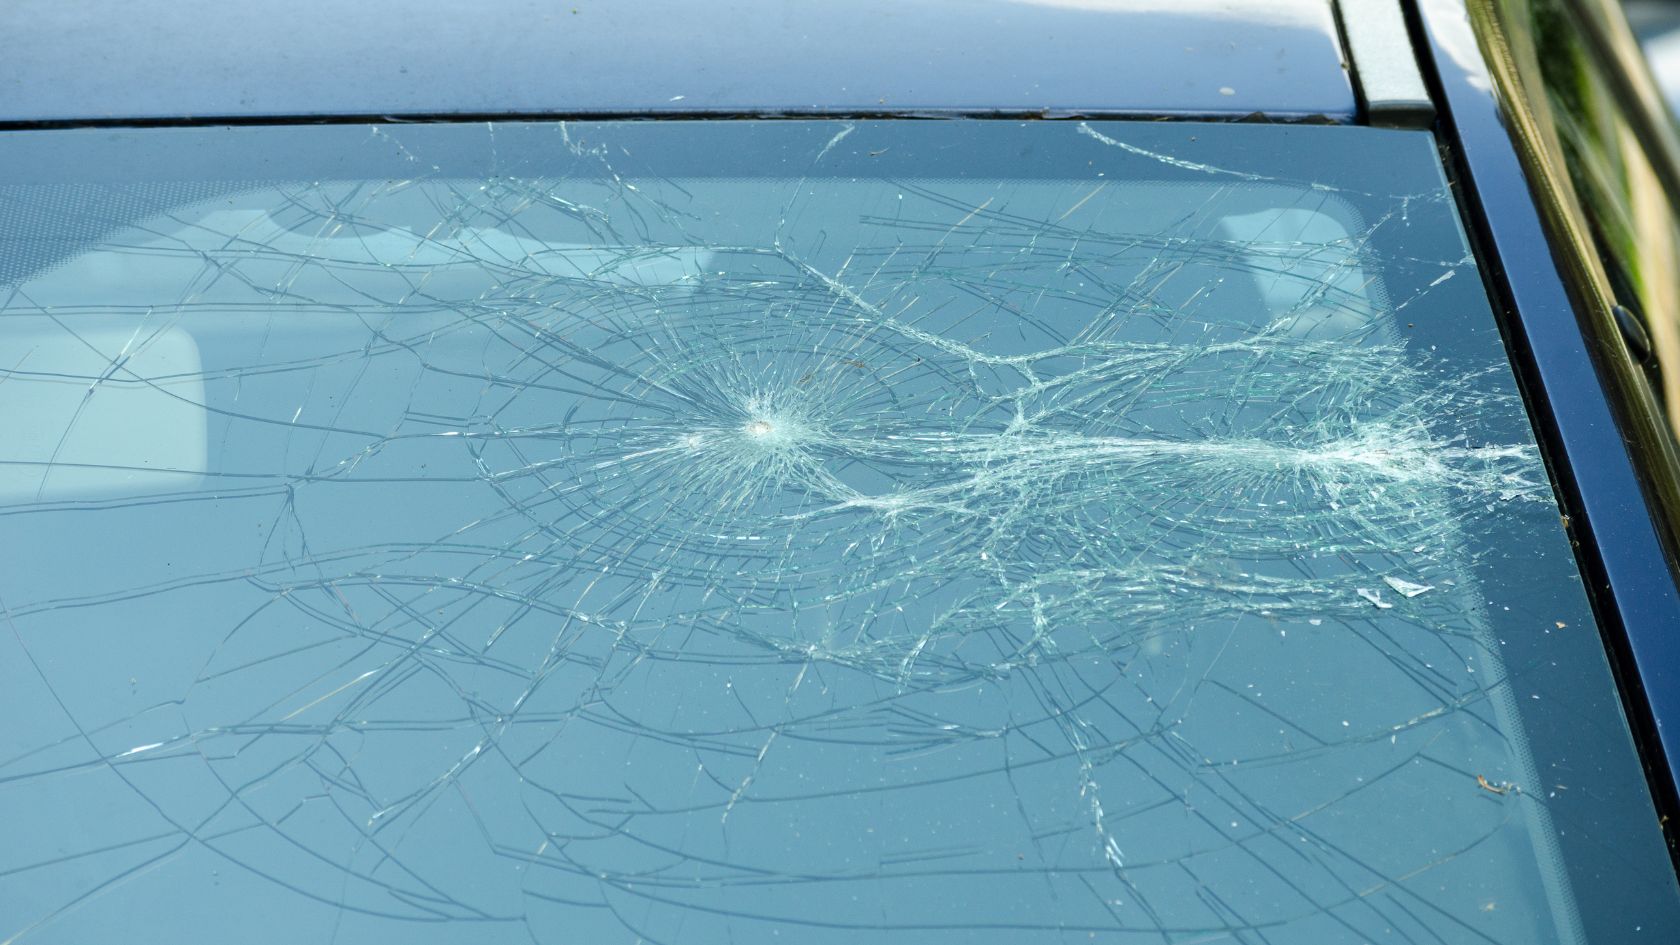
When it comes to automotive safety, laminated glass holds a prominent position in limiting the risks of accidents and visibility. But there are concerns about their durability. The question is, “Does laminated glass crack?” Whether you’re a car enthusiast or simply concerned about road safety understanding the type and integrity of your car glass is crucial. This article aims to provide informative and helpful insights into the fascinating realm of laminated glass technology. We’ll explore the differences between laminated and tempered glass, and its characteristics. We’ll also shed light on the causes of laminated glass cracking, a topic that piques the curiosity of many vehicle owners and drivers. So, let’s get started and demystify the enigma of laminated glass cracking! Yes, laminated glass can crack but not easily. Laminated glass is made of two layers of glass sandwiching a durable interlayer, often made of polyvinyl butyral (PVB). Unlike traditional glass, this design provides added strength and resilience, making it resistant to small impacts that may cause cracks and also reduces the risk of complete shattering. However, severe impact or external forces can lead to cracks, compromising its integrity. Even when it cracks it won’t shatter into sharp shards like standard glasses. The multiple layers of laminated glass hold the pieces together during the cracks and as a result of this, a spider web-like pattern is formed. Having said this, cracks in laminated glass can still be a safety concern, affecting visibility and structural stability. Understanding the design and the causes that can lead to cracks (and shattering in some cases) is necessary to remain protected on the road. Laminated glass is a specialized type of automotive glass used in various parts of vehicles, particularly in windshields. It is composed of two separate layers of glass that are bonded together with a layer of polyvinyl butyral (PVB) using heat and pressure. This design provides significant advantages in terms of safety, as the glass is less likely to shatter upon impact. It finds widespread application in windshields, where it offers optimal protection to drivers and passengers during collisions. Additionally, the interlayer helps reduce noise transmission, enhancing the overall driving experience. By legal requirements, all windshields must be made of laminated glass. Although side and rear windows are not mandatory to use laminated glass, an increasing number of cars now opt for this safer alternative for these windows as well. Laminated glass is renowned for its strength and safety benefits, but even this durable material is not entirely immune to cracking. Understanding the underlying causes can help vehicle owners take preventive measures and maintain the integrity of their automotive glass. Here are some key factors that can lead to laminated glass cracking: Impact and Stress: One of the primary causes of laminated glass cracking is a significant impact or force. It won’t break with a simple punch but need a sudden and forceful impact like a rock thrown up by another vehicle on the highway or a heavy object hitting the glass during a collision. In such cases, you can expect to see cracks in laminated glass. Temperature Fluctuations: The thermal stress caused by extreme temperature changes can lead the glass to expand or contract rapidly. Over time, this constant stress can weaken the glass and result in cracks. Poor Installation: Improper installation or using incorrect adhesives can create stress points on the glass, making it more susceptible to cracking. In rare scenarios, manufacturing defects in the glass or interlayer can also contribute to cracks. Age and Wear: Laminated glass, like any material, undergoes wear and tear with aging and continuous usage. As it ages, the chances of cracking increase. Lack of maintenance may also contribute to premature wear and tear and aging which makes the glass vulnerable to cracks. Chemical Exposure: Constant exposure to certain chemicals found in detailing products can deteriorate the interlayer of a glass. This can compromise the glass’s structural integrity over time leading to cracks. Vibration and Flexing: Frequent exposure to vibrations or flexing due to rough roads or driving conditions can weaken the glass and eventually cause cracking. To prevent or minimize the risk of laminated glass cracking, regular inspections by professionals are essential. Related Read: Can a cracked windshield break while driving? Promptly addressing any small chips or cracks is crucial to avoid further damage. Additionally, parking in shaded areas during extreme temperatures and ensuring proper installation during glass replacement can significantly extend the lifespan of laminated glass, ensuring a safer and more enjoyable driving experience for all. When laminated glass cracks, it initiates a process of breaking the surface layer of the laminate and then propagates along the interface with the inner layer, causing de-lamination. This process absorbs the energy of the striking force and prevents glass shards from exploding out of the laminate. Nonetheless, a network of cracks, resembling a spider web, will form. In simple terms, the laminate will still crack, but the risk of flying glass is minimized. However, it is crucial to note that in extreme cases of force/impact, penetration may still occur making the glass weaker to absorb any further damage. When it comes to choosing the right type of glass for various applications, laminated glass and tempered glass are two popular contenders. Tempered glass is processed through controlled heating and rapid cooling, resulting in increased strength compared to regular glass. Here is the set of common advantages and disadvantages between laminated and tempered glass: Laminated Glass Vs Tempered Glass Laminated glass is designed to remain intact even after impact, reducing the risk of shattering and minimizing the chance of injuries from flying glass shards. On the other hand, tempered glass is not as strong as laminated glass but more powerful than regular glass to withstand higher impacts without shattering. In terms of safety, laminated glass’s strength and resilience make it more challenging to break while tempered glass does break fracturing into small, rounded pieces, reducing the risk of serious injuries. Laminated glass blocks harmful UV rays, protecting the

How to Reduce Glare on Your Car Windshield: Mastering Glare Reduction
As you embark on your daily drive, the glaring sunlight during the day and the blinding headlights at night can turn your windshield into an obstacle course, putting your safety at risk. So, if you want to know how to reduce glare on your car windshield then explore this blog post till the end! This informative blog post will explore practical solutions to combat this ‘glaring windshield’ phenomenon. Moreover, you will learn about the preventive measures to reduce glare during day and night driving, the myth behind anti-glare windshields, and the magic of polarized lenses. Let’s uncover the secrets and equip you with the knowledge to conquer glare and drive confidently! To reduce glare on car windshields you can implement practical solutions in the form of – Regularly maintain your car windshield by cleaning it from the inside and outside. Use appropriate glass cleaning solutions to do this instead of abrasive chemicals. Secondly, replace any worn wiper blades and address any windshield chips promptly. Moreover, consider adding a light tint to your car windows and windshield as applicable. Lastly, invest in high-quality polarized sunglasses to enhance visibility. You must also consider tilting your rear-view and side-view mirrors slightly downward, and avoid looking directly at the headlights of oncoming vehicles during night-time driving. The anti-glare windshield is another effective solution to counter the reflections of glaring sunlight and headlights while driving. To implement these solutions it is imperative to learn about the causes that result in glare on car windshields. Glare on car windshields and windows can be a bothersome and hazardous issue during both day and night driving. Here are some of the causes that can make your journey disastrous: Reflections from Sunlight – Often during the day, sunlight is at its peak. When you are driving in these conditions sunlight can bounce off various surfaces like other vehicles, buildings, or water bodies, creating intense glare. This sudden brightness can temporarily blind drivers, affecting their ability to see the road clearly and increasing the risk of accidents. For instance, when driving on a sunny day, the sun’s reflection off a neighboring car’s windshield can impair your vision momentarily, making it challenging to react quickly to changing road conditions. Oncoming Headlights – It’s not about day but even night driving could hinder your ride. At night, the glaring effect of oncoming headlights can be particularly troublesome. The intense brightness of these lights against the dark surroundings can cause temporary vision impairment, making it hard to maintain focus on the road. For example, when driving at night and faced with a vehicle’s high-beam headlights, the glare can be blinding, making it difficult to judge distances and obstacles accurately. Dirty or Damaged Windshields – Another cause of concern for glaring is a dirty windshield. When you drive with a windshield having smudges, streaks, or debris it can scatter light. This situation can intensify glaring and hindering visibility. Additionally, chips, cracks, or pitting on the windshield’s surface can worsen light reflection, further impeding the driver’s view. For instance, when driving with a dusty windshield, the sunlight hitting the debris can create a scattered glare, making it hard to see clearly, especially in bright conditions. Improperly Adjusted Mirrors – Misaligned rear-view and side-view mirrors can reflect strong light directly into the driver’s eyes. If you are not attentive to the mirror position it can add to the glare and make it difficult to concentrate on the road ahead. For example, if the side mirrors are not adjusted correctly and reflect the headlights of the vehicles behind, it can cause distracting glare and reduce visibility. The causes of glaring are inevitable however, addressing these causes promptly can make your driving risk-free and safe. First of all, using the sun-visor that is available in every vehicle is the best option to deal with glaring sunlight. If visors don’t work as expected, you can implement the following tips and solutions to minimize glare and ensure a safer driving experience: Keep Windshield and Dashboard Clean Maintaining a clean windshield is vital for optimal visibility and safer driving. And it is not about just going through the windshield and glasses using a dry cloth but proper cleaning. Make sure to regularly clean both the inside and outside of your windshield as well as the dashboard. To do this, use a gentle glass cleaner to maintain clarity and reduce reflections. Home-made solutions such as soaps/liquids are also handy but may not be effective in providing enough clarity to counter the glare. For stubborn stains like dead bugs or tar, consider using a commercial windshield cleaning product specifically designed to remove them. Don’t neglect the inside of your windshield when washing your car. Use an appropriate cleaner and a microfiber cloth to clean the interior to ensure a clear view of the road ahead. It is important to note that regular cleaning also prevents scratches caused by windshield wipers. Avoid Wax or Car Shine Products Using wax or other auto-detailing products on car windshields can create a reflective surface that can worsen glare. Even on car paint surfaces, opt for protective coatings to shield the troublesome glare which otherwise leads to scattering off the hood impairing your vision. The unintended consequences of using wax or other shiny products on car glasses or surfaces could compromise visibility while driving. Stick to appropriate glass-cleaning solutions and detailing products for optimal results. Ensure Regular Maintenance of Windshield and Wipers Your car windshield and wipers go hand in hand when it comes to seeking proper visibility and cleanliness. Most drivers often rely on wipers to wipe off the windshield and doing so regularly could leave streaks and residue behind if the wipers are not maintained. In addition, maintaining your car’s windshield in top-notch condition can significantly impact how sunlight filters through. Any cracks, chips, or scratches even of small nature could reflect the sunlight glare throughout your car. To counter this, keep the windshield well-maintained by promptly repairing chips, cracks, or pitting. Similarly, replace worn-out