
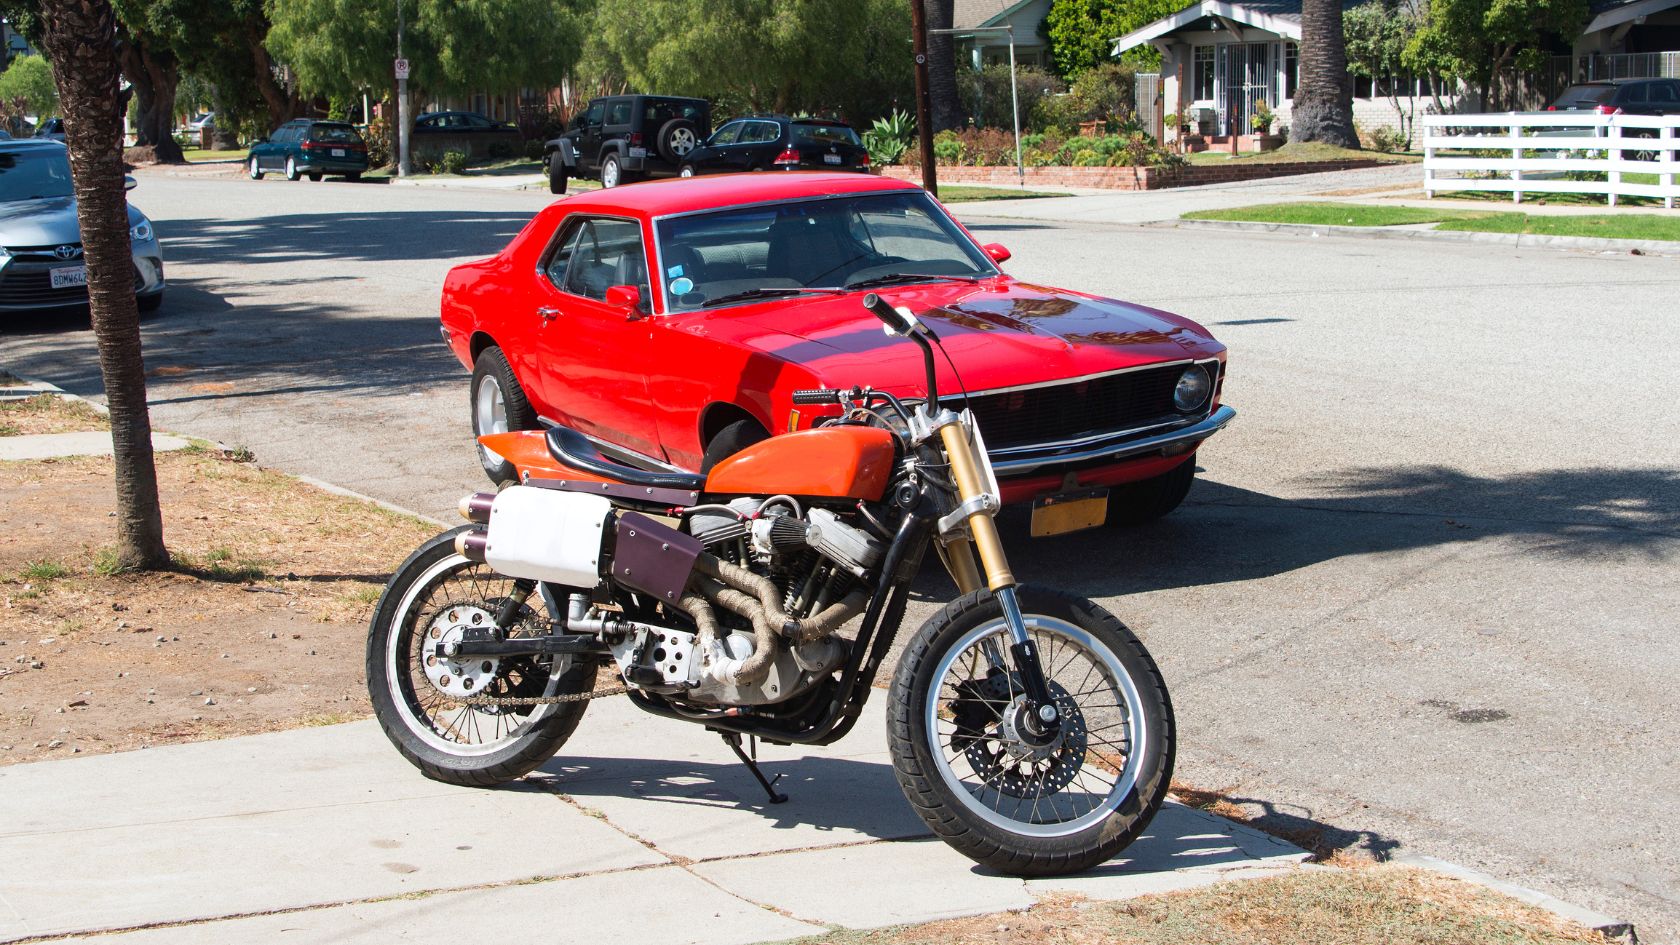
Generally, a car is used to jumpstart another car with a dead battery. But can you jumpstart a car with a motorcycle battery? The jumpstarting process works on certain conditions related to battery voltage, and engine capacity. A motorcycle battery may not be strong enough to power a car battery but in some cases, it does work. If you want to know more about jumpstarting a car with a motorcycle, continue reading. In this post, you will learn about the prerequisites, precautions, and jumpstarting process to be applied while connecting a motorcycle to jumpstarting a car. In certain circumstances yes, you can jumpstart a car with a motorcycle. But the execution is dependent on some factors like the size of the battery, voltage power, amperage capacity, and more importantly the condition in which you are jumpstarting a car. Jumpstarting a car battery with another car should be the first priority. It is also a more favorable and recommended option. However, in the events leading to jumpstarting a car with a motorcycle, it is essential to consider the following factors before taking any action. First of all, the battery voltage of both vehicles should be equal. For example, most cars have 12.6 volts batteries so, a motorcycle getting used for jumpstarting should have an equal amount of battery volts. The car battery requires a larger current flow to start which could hamper the technical functioning of a motorcycle battery due to its limited voltage capacity. If the battery voltage of a motorcycle is lower than that of a car it may not be able to provide enough power to start the car. Consequently, attempting to jumpstart a car with a motorcycle having a low-voltage battery can potentially damage either vehicle’s electrical system. Generally, four-wheelers have a bigger capacity engine size than a motorcycle. The engine size/capacity doesn’t necessarily affect the ability to jumpstart a car with a motorcycle. However, a 100cc bike may not necessarily boost the engine enough to transfer the current flow to a car’s 1400cc engine compared to a 650cc bike. Secondly, bigger car engines pull too much power which could again be damaging the electrical components of a small-engine motorcycle. The condition of the battery requiring a jumpstart should not be completely dead. If you are looking to jumpstart a battery that hasn’t been active for a long time say a year then jumpstarting it using a motorcycle may not produce desired results. A completely dead battery demands really high power of electrical current and to do this a considerable amount of jumpstarting will be needed. A standard motorcycle battery is not built to accommodate such large currents unless you have a two-wheeler with a really bigger engine and battery capacity. The amperage capacity of a motorcycle battery is around 200amps and the requirement to jumpstart a car battery is between 200-400amps. Related Read: How many amps can jumper cables handle? Though the amperage capacity of a motorcycle battery is lower it can still jumpstart a car provided the battery has 12 volts of power. A motorcycle with a lower amp capacity may take longer to jumpstart a car which could impact its sustainability to continue transmitting the power. Weather conditions and the place where you want to perform the jumpstarting process are important. In hot temperatures, either vehicle component will remain heated up inside their respective hoods. If you are intending to jumpstart a car with a motorcycle in an open area under the hot sun make sure the batteries are not overheated. As part of the jumpstart process, you will need to keep the motorcycle in running stance and even rev to certain RPMs for instant results. If you try to jumpstart batteries in overheating conditions it may produce sparks, and fire leading to explosions. To avoid such harmful impacts of hot weather, it is better to let the vehicle components cool down or perform the jumpstarting process under the shade or in a garage. On the other hand, under cold weather conditions, the battery components tend to freeze. So much so that it is difficult to start the vehicle irrespective of its size. This is where cold cranking amps of a car battery come into the picture. The cold cranking amp is measured based on the power output capacity of a battery in cold weather. The higher the cold cranking amps the better output you get from the battery. The information on the cold cranking amp rating is clearly mentioned in the vehicle’s manual so glance through it for proper guidance before attempting to connect two batteries. In the case of jumpstarting, an average cold cranking amp rating of a motorcycle is between 200-400amps compared to the range of 200-600 amps of a standard four-wheeler. So, if the conditions are too cold, and the cold cranking amp rating of a motorcycle battery is below the required level of a car battery it is better to delay or avoid the jumpstarting process. Once you are sure of having all the above factors in place it’s time to know how to actually jumpstart a car with a motorcycle. To do this, follow the below-given steps: Here is a small video on jumpstarting a 2200cc car with a 400cc bike successfully: While the process is very similar to that of jumpstarting a car with another car the end result could differ. Along with all the resources and conditions, it also takes a little bit of luck to jumpstart a car with a motorcycle in some cases. So, if the car doesn’t start even after multiple attempts of jumpstarting then it is better to take some professional help rather than damaging one of the vehicles. In some cases yes motorcycle battery has the same voltage capacity as a car battery. But, in reality, motorcycle batteries are technically not designed with the same power and functionality as a car battery. It is therefore important to consider certain factors like the voltage capacity, amperage, engine power, etc. of a

Symptoms of low water in a car battery: How to identify and resolve
Car batteries are prone to discharging and getting faulty due to overcharging and many other technical reasons. One of the reasons many motorists may not be aware is low water levels. How to tell if your car battery is low on water? What are the symptoms of low water in a car battery? If you are looking to find the answers to the above questions then this is the post to read. We will also cover the causes, preventions, and methods to fulfill the shortcomings of water levels in a car battery. So, keep reading! Symptoms of low water in a car battery include starting problems due to engine cranking, warning signs on the car dashboard, and battery losing charge repeatedly in quick time. Extremely hot weather is another reason that evaporates the liquid of a car battery making it lose water. Corrosion on the plates/terminals is a common cause of battery problems and can contribute to the symptoms of low water levels. The corrosion aspect is often attributed to the lack of maintenance. So, if you are one of those lazy drivers who hardly bother about their vehicles then be ready to notice water abnormalities in the battery structure. It is important to understand the technical aspects of the above symptoms that will help you take precautionary steps proactively and avoid major damage to the battery and overall vehicle. But before diving into the symptoms it is important to understand the role of water components in an automotive battery. The liquid component which is often mistaken with water is actually sulfuric acid. Yes, there is some water added to the acid chemical for the purpose of balancing the concentration liquid. With time and usage, this water starts reducing which is a normal process. Generally, the water gets utilized as a part of the chemical reaction of the sulfuric acid electrolyte process within the batteries. As a result of this utilization, the water evaporates through battery vents in the form of hydrogen and oxygen gases. To counter low water levels periodic inspection and maintenance are enough. However, there are some external sources that add to the woes of reducing water levels in a car battery. If you begin to notice any of the following symptoms it is a potential indication of low water levels in your vehicle battery. In extremely hot temperatures, the evaporating process of liquid happens much faster compared to normal circumstances. Related Read: What makes car batteries explode When the water starts declining it restricts the lead plates to perform the electrolyte process. This is essential for a car battery to function properly. Water getting diminished means sulfuric acid getting more concentrated oxidizing the lead plates resulting in mal-functionality. It is important to monitor the temperature levels while using your vehicle. If it’s getting too hot, ensure to check the water levels in your car battery regularly. If the shortage is below the recommended levels fulfill the gap with distilled water for better performance, and smooth running of your vehicle. If you find that the car battery is losing its charge constantly it could be because of low water levels. Again, when the water level reduces too low the sulfuric acid gets highly concentrated and disturbs the electrolyte process. This can result in the battery losing charge quickly. The battery will not be able to hold the charge for too long on recharging until some effort is made to fulfill the water levels. The corrosion aspect comes into the picture when the lead plates are unveiled to the outer environment. This is a result of water going below the recommended levels that exposes the lead plates. Owing to this exposure there is a buildup of corrosion around the plates and battery terminals which makes it harder for the battery to continue the electrical flow. If you find corrosion forming around battery terminals the first step you must take is to check the water capacity and bring it back to the recommended levels. A weak battery has many impacts on the performance of a car and when there is slowness in starting the engine it could be another sign of a low water level. A vehicle battery works on a chemical reaction to generate electricity that powers the engine and other electrical components. Lack of water limits the powering capacity of an engine that just produces a cranking/clicking noise instead of starting. Signs of battery warnings on your car dashboard will get very common due to malfunctioning batteries. It is important to pay serious attention to the warning signs and oblige by inspecting the condition of the battery. If you find any of the above symptoms it is time to juice up the battery with the correct water levels. Based on these symptoms you can take the necessary steps to energize your car battery including adding water. However, it is also imperative to know the causes behind a car battery losing water. Overcharging – When the battery is overcharged courtesy of human error or by the alternator the excessive charge impacts the mixture of sulfuric acid and water. As a result of overcharging, the electrolyte mixture begins to heat up and evaporate. This evaporation decreases the water level in the battery leaving it with less liquid to conduct electricity. Lack of maintenance – Due to lack of maintenance, a car battery is vulnerable to internal leakages and damage. Failure to inspect the condition of the battery in a timely manner attracts corrosion and rusting on its terminals. Both scenarios are instrumental in reducing the water levels causing a battery to perform badly. Temperatures – Exposure to very high temperatures limits the capacity of a car battery to hold its water level. With constant heating, the water evaporates through battery vents leaving the sulfuric acid concentrate unbalanced. It is therefore crucial to inspect the water levels of a car battery as part of self-maintenance, monitor the charging process, and protect your vehicle by parking it under the shade

Can a weak battery cause a car to run rough? 5 symptoms & causes revealed
Have you been noticing a rough ride from your car? It is not unusual for a car to go rough but what matters is the reason behind it. Can a weak battery cause a car to run rough? Or is it the alternator or spark plugs or any other component that is restricting the power to not let your car run smoothly? Well, these are some of the questions that arise in a vehicle owner’s mind sensing roughness and this is what you will learn about in this post. What’s more, we will deep dive into the causes, symptoms, and remedies related to a weak battery. So, continue reading! Yes, it can. A weak battery can cause various issues in the car and rough idling is one of them. One of the main reasons for a car to run rough meaning the engine is just not up to the mark while starting are spark plugs. You will feel vibrations, loud noises, and in some cases even stalling/idling when spark plugs misfire for not getting enough electrical power from the battery. A car running rough is not limited to misfiring spark plugs but it involves a hell lot of other reasons. A battery is responsible to power all the electrical components of a car including the engine. This means if the battery itself is powerless all the other electrical parts are bound to take a hit. Eventually, a car may run rough due to a bad alternator, and misfiring of the engine that affects many of its associated parts such as a fuel pump, pistons, valves, air filters, etc. to lose their effectiveness in starting or running the car properly. If you feel your car is running rough or idle due to a weak battery look for the below symptoms. Here are some of the symptoms indicating a weak car battery that could be causing your car to run rough – Difficulty starting the engine – If your car has a weak battery there will be difficulty in starting the engine. As the battery is responsible for providing the initial power to start the engine any weakness in the power leads to pause, hesitation, and stalling of the engine in some cases. When the battery is weak the ignition system of a car does not get sufficient power to pump the engine cylinders that move the car. Hence, the engine starts to misfire due to lack of power and if a car battery is totally dead the engine may not start at all. Dull headlights and other electrical components – Another symptom of a weak car battery that is often visible upfront is the dullness or dimness of headlights. If the dullness in headlights is difficult to observe you may also notice the interior lights of a car getting low. You can also see the performance impact on a car radio, GPS, dashboard, and any other component that relies on battery power. This is because the battery that is responsible to power the electrical components is power sick. The sickness causes a significant drop in voltage levels of a battery and supplying the power to other parts of a vehicle gets difficult. If you notice dimming of headlights and other electrical accessories it is a good idea to switch them off immediately to save some battery power. Cranking or clicking engine sound – If the battery is weak a common sign that occurs while starting the engine is a click or a crank. This is very much audible when you enter the key and turn the ignition. When you turn the key in the ignition, it prompts the starter motor to start the engine. However, due to a lack of power from the battery, it is just able to release a clicking sound while attempting to turn the engine on. Clicking or cranking sounds should be enough to help you identify the weak signs of a battery and take appropriate action. Warning lights on the dashboard – Many car dashboards flash warning lights when the battery is low on power. This is one of the easiest methods to realize the condition of your car battery. The battery symbol is another common sign when you turn the key in the ignition however it remains on the dashboard for a long time even after starting the engine. On some vehicles, there are warning lights other than a battery symbol indicating a problem in the car’s electrical system. Bad condition of the battery – You must also keep a tab on the battery condition once they have crossed their age. The ominous signs of aging begin with cracks and leakages on the battery case which makes it appear swollen or bloated. If the battery has aged and started showing signs of cracks/leakages it won’t be able to hold the charge and voltage to power the electrical system and vehicle’s engine. Nevertheless, proper precaution and action are required to keep your car battery in good condition to avoid instances of weakness. To do this, it is imperative to know… So, what causes a car battery to get weaker? The causes may vary depending on the location, usage, and vehicle’s make/model but some of the common ones are listed below: Age limit – If the battery has survived its lifespan which is normally between 3-5 years chances of weakness increase. An aged battery lacks the ability to hold the charge for a longer time making it lose a significant amount of voltage rapidly. Secondly, the combination of age and weakness deteriorates its condition from the inside and outside which results in cracks, damage, and leakage of fluids. It is important to maintain your car battery properly for its longevity. In case it has crossed its recommended age ensure to replace it with a new one immediately. Lack of maintenance – Lack of maintenance has many adverse effects on a car battery. A car battery expected to perform systematically should be monitored periodically. If regular maintenance

What happens if you touch jumper cables together?
Looking to know what happens if you touch jumper cables together? This post has the answer. The jumper cables are used to jump-start a dead car battery. There is a specific process to be followed when using jumper cables. Any negligence in handling the jumper cables carries the risk of injury, sparks, and damage to the people using it and the vehicle. Touching jumper cables together is one such risk. Learn more about the consequences and damages of touching jumper cables together by reading further. You will also find information on the after-effects and follow-up steps to be taken post touching the jumper cables together. Touching the jumper cables together has two results. One, if you touch the jumper cables together without connecting them to anything there is no harm. Second, if you touch the jumper cables together after connecting them to one of the battery posts it will generate sparks. The intensity of sparks may vary depending on the way you touch the cables together. If it is done on a casual basis just to check if the jumper cables are working fine then you are dealing with mild sparks. Related Read: Jumper cable sparks when connecting Eventually, there could be larger sparks and even electrical surges if you accidentally or purposely touch the jumper cables together while connecting to the battery. The results of sparks could be dangerous if they come in contact with hydrogen gases released by the battery. In some cases, risks associated with jumper cable sparks could lead to electrical shocks, and significant damage to the vehicle’s electrical system, jumper cables, and to the person who is using it. It is therefore important to handle and use jumper cable with proper care and safety instructions. Touching jumper cables together? Now, why do you want to do that? Some people do it because they have a habit of doing it. They want to ensure that jumper cables are working fine and there is proper electrical flow passing through. However, the resulting sparks are momentary and carry low risk. For someone who hasn’t done it before may touch the jumper cables together in the wrong way. If jumper cables are touched together and left in the same position for a long time there could be continuous sparks. The magnitude of sparks is fumed further by the voltage power and amperage of the working battery. Technically speaking when jumper cables are connected to a car battery they begin to carry a certain amount of current flow. Because of the low resistance capability of jumper cables, there will be a sudden surge in the electrical current that causes a short circuit because of the voltage difference between the two connecting objects. In this case, the electrical current generated from a working battery flows through the jumper cables into the person’s body holding/touching it together. The severity of sparks and electrical shocks can not only impact the vehicle and its components but it is more dangerous for a person who is holding it. The result of such shocks could cause permanent injury and even death. The impact of touching jumper cables together is not limited to the person holding it but can severely damage the vehicle’s electrical system. The damage can impact both vehicles. Severe damage is associated with the vehicle that is connected with jumper cables. The sudden surge in the electrical current flow causes the voltage spike. This can be too much for the electrical components of a vehicle such as an alternator, fuse, wiring, and the battery itself. To elaborate further, a short circuit in the fuse or wiring will restrict the power from reaching the electronics of a vehicle. This will result in the malfunctioning of headlights, radios, gauges, starters, and many other accessories and components connected through wires. The impact may be soft or hard depending on the voltage power but any kind of overload due to excessive current flow has the potential to damage the electrical system to the replacement extent. On the other hand, if the person touching jumper cables together causes sparks close to the receiving vehicle’s battery or electrical components it will have a similar impact to that of the donor vehicle. Here the current may not flow to the electrical system but sparks generated with the touch of jumper cables can ignite the hydrogen gases of a dead battery resulting in collateral damage to other parts of the vehicle. The connection between the clamps impacts the jumper cables the most. They are at the receiving end of losing the conductivity strength and power to withstand current heat. The electrical surge caused by the touching of jumper cables each other weakens their insulation resulting in melting and even burning of wires. Additionally, the excessive flow of current can cause metal clamps at the end of the cables to heat up potentially leading to melting and deformation. This will lead to difficulty in using the cables next time as deformed clamps cannot hold the battery terminals properly. This means touching of jumper cables may kill their efficiency of jump-starting a vehicle. So, what can you do if you accidentally touched jumper cables together, and that too for a longer time? If nothing is found the cables are good to use for next time. In case of any damages, it is better to replace them instead of storing them. If the vehicle starts smoothly that means no major parts were impacted by the jumper cables. Ensure to check the electrical components such as headlights, radio system, etc. are working fine. To avoid future risks, advise the person to get the vehicle inspected by a technician asap. This may not be required if the incident of touching jumper cables happened away from your vehicle. Still, it is better to inspect the vehicle. While handling jumper cables ensure to follow below steps: Take one step at a time. Don’t be in a rush to perform the act quickly. You are dealing with risky electrical

How many amps can jumper cables handle? Amperage factors revealed
There are many factors to consider while choosing a good-quality jumper cable and one of them is amperage. If you are wondering how many amps can jumper cables handle then continue reading this post to find the answer. A set of jumper cables is an essential supplement unit to restart your vehicle in a dead battery situation. However, a wrong selection of amperage in jumper cables may not be able to wake your vehicle battery. So, what should be an ideal amp for your vehicle and the different size of vehicles? What are the other factors that determine the amp capacity of jumper cables? What are the precautions one must take while using jumper cables with different amps? Let’s find the answers to these questions and many more in this post. The amps or amperage capacity of jumper cables depends on various factors. A typical set of jumper cables with a 10-12 gauge wire can handle up to 200amps, while thicker cables with a 4-6-gauge can handle up to 400amps. The higher the gauge the lower will be the amps. Generally speaking, jumper cables having 200-400 amps capacity are sufficient enough for most cars, SUVs, and light trucks. In some cases, you may require to use jumper cables with more than 400amps depending on the power capacity of your vehicle batteries. Some companies claim to offer up to 1000amps which could be exaggerating numbers. Regardless of the amperage capacity, it is also important to choose the proper gauge, and length for jumper cables to avoid any safety risks and prevent sparking or arcing scenarios on battery terminals. The amperage capacity of jumper cables is designed to handle the transmission of maximum current flow between the two batteries. The amp capacity is a crucial factor to avoid overloading the current flow. For example, a dead battery possesses less than 12 volts against a charged battery that has more than 12 volts. The contrasting power difference can lead to sparks and damage to the batteries and electrical components of a vehicle due to a lack of amperage capacity in the cables that are transmitting them. Another example is the difference between the two cars. If the donor car battery capacity is higher than that of the receiving car the jumper cables used should be able to take a load of a bigger battery to transfer the voltage smoothly. If the amp rating is lower or does not match the recommended levels there are chances of the cable getting overheated and damaging the battery components and even generating larger sparks. The amperage capacity is typically indicated by a gauge number. Gauge numbers vary from 1-12 and some may even go up to 16 gauges. A gauge of jumper cable can be determined by its diameter. The lower number of gauges means thicker cables and higher amperage capacity. It is, therefore, necessary to pay attention to the gauge of jumper cables which will by default match or exceed the amperage capacity of your vehicle needs. Gauge is one of the most important factors in determining the amperage capacity of jumper cables. Having said that some of the other factors associated with jumper cables cannot be ignored. When you have decided on the gauge of jumper cables ensure to check the following aspects as well: Length – While considering the length the cables should not be too long. As mentioned earlier, the lengthier the cable, the lower the amperage capacity it will have. Therefore, make sure to have cables long enough to cover the distance between two vehicles. A 10 to 15-foot lengthy cable should be an ideal choice however a 20-foot long will be perfect if it carries an amperage rating of 400 amps or more. Connectors/Clamps – It is crucial to consider the quality of connectors/clamps on the jumper cables. Clamps can be identified as alligator-shaped clips that attach to the battery. Since the clamps are the last point of contact on battery terminals they should be strong enough to hold themselves against the passing electricity. Clamps typically resemble copper material which is a powerful conductor of electricity. If the quality of clamps is mixed with other materials it can cause voltage drop, heat buildup, and arcing which can damage both battery and electrical system of a vehicle. Insulation – Insulation is another important factor that keeps the wires in good shape and condition. Irrespective of the length and thickness, jumper cables are prone to wear and tear courtesy of hard weather conditions and wrong storage. Well-insulated cables can withstand the risks of cold weather and extreme heat. Rubber and PVC material insulation provides quality thickness and durability to jumper cables to protect them from external environmental conditions and accidental contacts. The list of factors doesn’t end here. There is more to choosing a good-quality jumper cable and if you are looking forward to finding out more about them then check here. Small and compact vehicles – For small and compact cars, a jumper cable with an amperage capacity of 300- 400 amps should be sufficient. This is considering the type of engine and battery voltage such cars carry. Along with amperage ensure the gauge of cables is between 4-6 and not less than 10 feet in length. Full-size sedans – A 6-gauge and 20-foot long jumper cable with an amperage capacity of 400 amps should work absolutely fine on medium and full-size sedan cars. SUVs/mini trucks – Looking at the size, battery voltage and engine power of SUVs and mini trucks a 4-gauge jumper cable with a 20-foot length and 600-800 amps can do the job of jump-starting easily. Jumper cables can handle amps according to their gauge size, connector material, and insulation quality. For most cars, a 4-gauge jumper cable with an amperage capacity of 400 amps or more can transmit the current flow smoothly. However, if you have a heavy vehicle consider choosing a 1-2 gauge wire with close to 800 amps capacity jumper cables. The amp rating is

Why do you have to ground jumper cables? Reasons and best places identified
Grounding one side of the jumper cable is a common procedure advised and followed by many motorists. But why do you have to ground jumper cables rather than simply connecting them to the other battery terminal post? The process of jump-starting is an effective way to jolt the car battery. At the same time, the process involves dealing with potentially harmful electrical components that could pose a risk if the cables are wrongly connected. Grounding jumper cables is one of the important steps in following the jump-starting process correctly. The reason behind grounding, the appropriate places to ground the jumper cables, and the importance of grounding the jumper cables are something that we will cover in this post. We will also look at some other aspects of grounding the jumper cables to help you learn the process and stay safe while performing jump starting. The primary reason to ground the jumper cables is to prevent any electrical hazards from occurring during the jump-starting process. Now grounding doesn’t mean the earth ground. Technically, it is the chassis ground that is referred to as jumper cable grounding. Connecting to the metal part, unpainted metal frame or engine block helps dissipate any electrical charge that might build up while the vehicle is being jumped. Grounding of jumper cables is one of the important safety measures that help minimize risks of electrical shocks or damage to the vehicle’s electrical components. The jump-starting process requires two vehicles to create an electrical circuit/flow between the two batteries. To do this, a proper cycle of an electrical circuit is a must to avoid excess voltage. Car batteries have a voltage capacity of 12 volts. The positive terminal possesses +12 volts and the negative terminal has -0 volts. This contrasting difference in volts between the two terminals is the main reason behind connecting the positive jumper cable to the positive post and the negative jumper cable to the negative post. Any reverse/wrong connection could create sparks because of the voltage difference. A car battery is architected with the help of electrolyte solutions in the form of water and sulfuric acid. Under normal circumstances, this electrolysis process buildup hydrogen gases which are released through battery vents. There is a risk of sparks and flames if the hydrogen gas comes in contact with other flammable substances. When two vehicles are connected with jumper cables correctly it passes the balanced current flow to jump the battery. On the contrary, if jumper cables are wrongly connected meaning positive to positive and negative to negative (instead of grounding) it can cause electrical surges and sparks due to excess voltage. Grounding the negative cable to a chassis or any other metal part of a vehicle ensures a smooth flow of electrical current and prevents any electrical shocks/hazards arising due to harmful hydrogen gases around a car battery. So, technically connecting the positive cable to the positive terminal and the negative cable to a chassis ground/metal part rules out any possibility of igniting battery gases avoiding any sparks and explosion. Various electrical hazards/risks occur during jump starting process if cables are not grounded: Electrical shocks – Ungrounded cables can produce electrical shocks while connecting. When the electricity flow passes through the cables it can create electrical shocks by clashing with any of the metal objects. The electrical shocks may not be limited to the metal parts but can impact the car and the individual close to the cables. Sparks or fire – Sparks cannot be avoided if jumper cables are not grounded. The sparks arising due to ungrounded cables can ignite the hydrogen gases around a car battery that can convert into a big fire. Related Read: Jumper cable sparks when connecting Damage to vehicle components – The electrical components of a vehicle is always at risk of getting damaged if the jumper cable is not grounded. Without proper grounding, the power surge can damage sensitive electronic parts such as a radio, computer, etc. It can also impact the performance of other vehicle units including an alternator and the battery itself. There is always confusion in deciding the best place to ground a jumper cable. To help you make decisions faster here is the list of the best places you can use to ground jumper cables: Engine block – The engine block is primarily one of the best places to ground the jumper cable. This is because the engine block has a large surface area that makes it easy to attach the jumper cables. More importantly, it provides a direct connection to the negative terminal of the battery. The large and sturdy metal surface is a perfect place for the cable clamp to make a good connection. It is also considered an ultimate grounding point for the vehicle’s electrical system. Look for a clean and unpainted surface for grounding the jumper cable on the engine block. Chassis – The whole chassis is typically considered an extension of the negative terminal. This makes it the second best place to ground the jumper cable as the risk of electrical hazards and shocks with the chassis is the bare minimum. The chassis is also instrumental in providing the direct return path to the working battery which results in better current flow and a lower drop in voltage. Make sure to choose a place on the chassis that is without paint and dirt for better connection and current flow. Grounding lugs or terminals – Grounding lugs are usually located near the battery and can be directly connected to the vehicle’s frame. Grounding lugs or terminals are made of strong quality metal that can withstand the high current flow that passes through jumper cables. The location and design of grounding lugs reduce the risk of damage to the electrical system and injury/shocks to the person performing this task. Alternator bracket – Another place in contention for grounding the jumper cable is an alternator bracket. Since the alternator bracket provides a direct connection with the engine block it becomes easier